Manage staff records, cohort assignments and invitations
Find the colleague, review and save their intended year and class assignments, then check the role and address before sending an invitation. In a school with manually maintained records, you can also add/edit staff and record leaving or re-joining. Directory details, a login, group assignments and permission changes are different things.
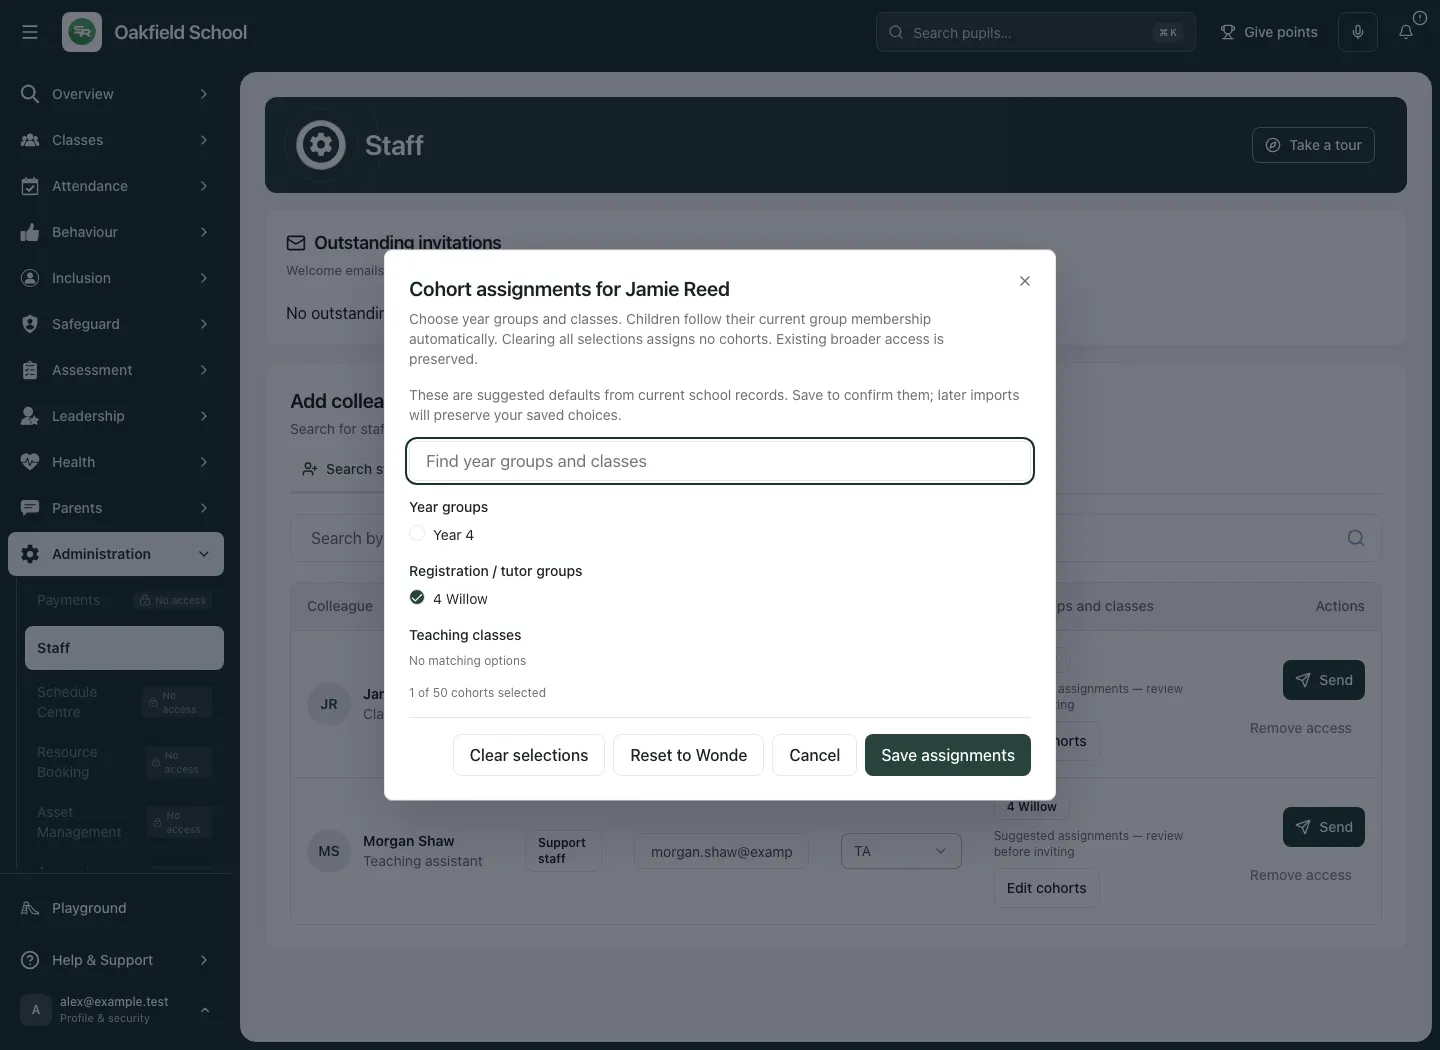
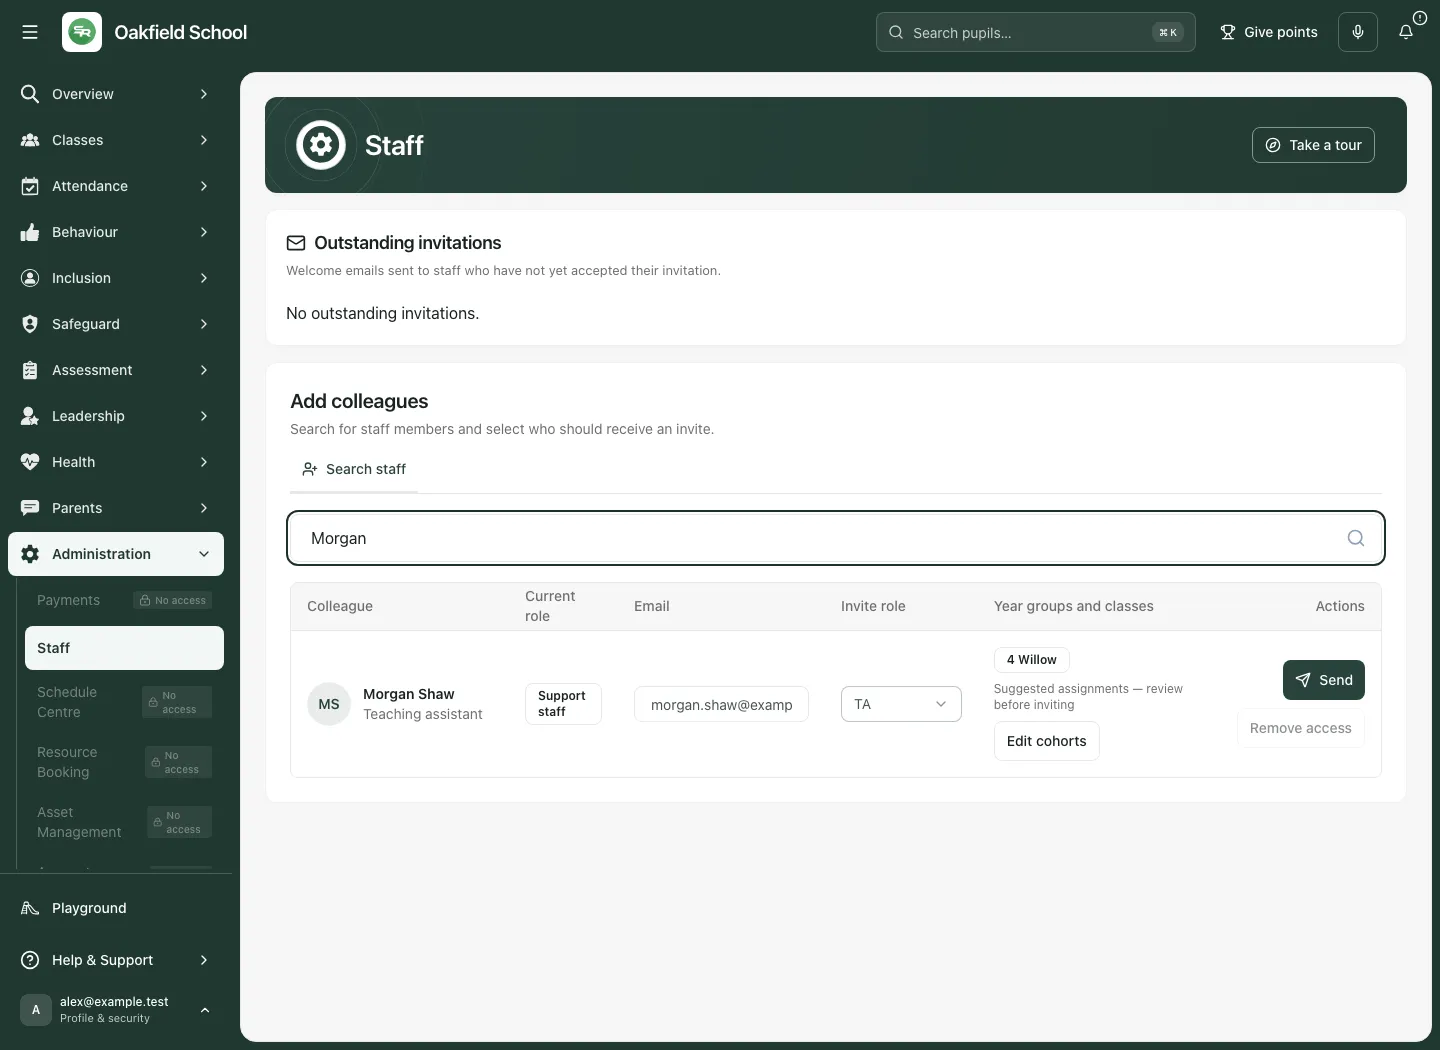
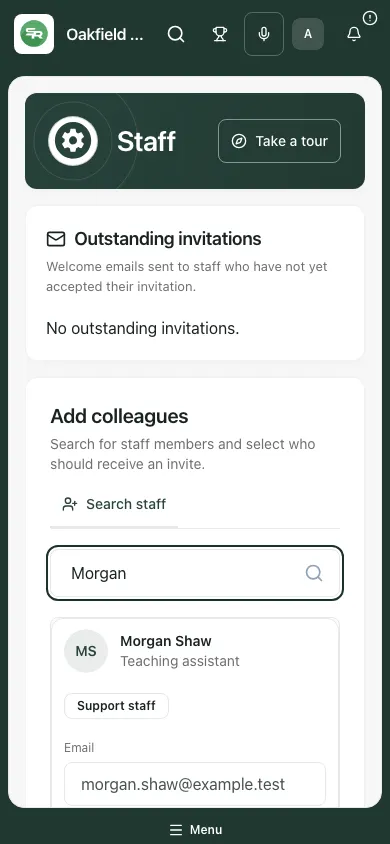
The fictional example has Jamie Reed and Morgan Shaw assigned to 4 Willow. Jamie’s cohort selections are reviewed, saved and reopened below. No invitation is sent in the example.
1. Before you begin
Section titled “1. Before you begin”Open Staff under Administration. Confirm the school, colleague and intended duty before changing access. Staff invitations, elevated invitations, permission management, creating records and removing school access require different authority. A school leader who can see the list may still need an authorised colleague to send or manage invitations.
The school workspace uses the Staff directory and row controls. The standalone onboarding invitation page has additional batch/page-access controls; do not assume those are part of every directory row. Alternative provision uses Staff and access, with a reviewed invitation handoff and different class/working-hours arrangements.
A staff record describes the person. Linking an account lets them sign in. A role sets broad responsibilities; year/class assignments and more specific permissions determine what they may access. A context link is never permission to see restricted pupils or records.
2. Find the colleague and read their current state
Section titled “2. Find the colleague and read their current state”- Open Staff and review Outstanding invitations before sending another welcome email.
- Use Search staff to find the intended colleague by the supported search terms. Check the name and job title rather than relying on initials.
- Read Current role, Email, Invite role, Year groups and classes and Actions.
- Use Show N more when the first page of displayed staff is not enough. A filtered or limited list is not the whole school.
- Review the actual linked account information. A staff member who already has a login is different from someone whose directory record merely contains an email address.
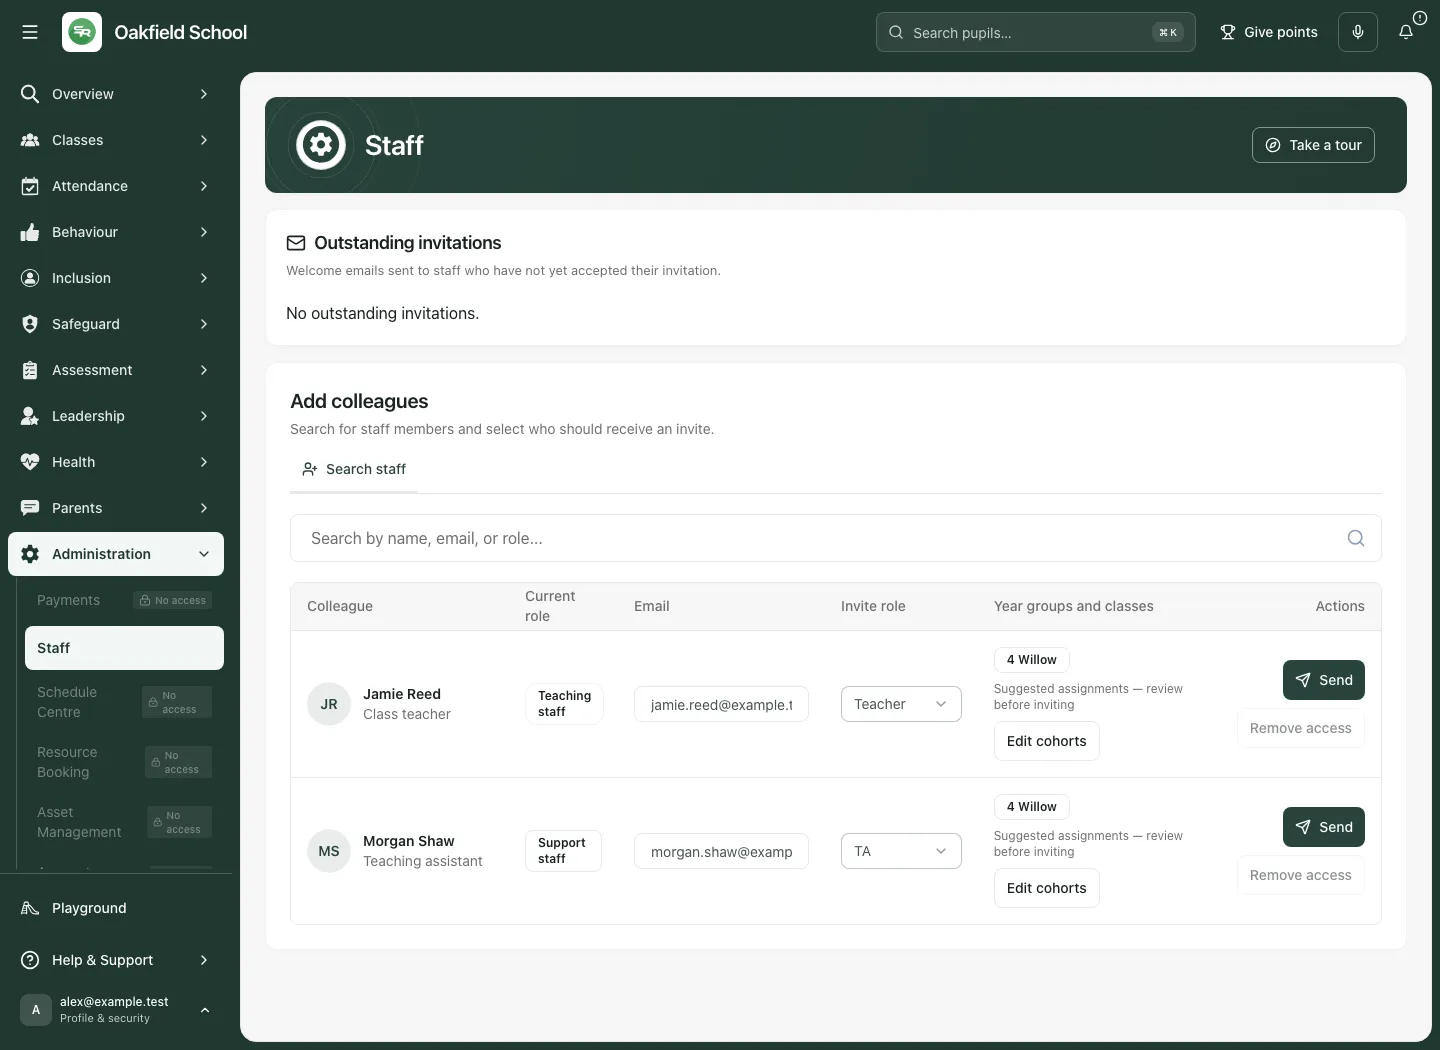
Email can be locked after an account is linked or an invitation has been sent. Do not overwrite a directory email to try to transfer somebody else’s login. Use the authorised account-management route for an existing account.
3. Review year groups and classes before inviting
Section titled “3. Review year groups and classes before inviting”Suggested assignments come from current school records. They need deliberate review; a suggestion is not a confirmed permission decision.
- On the intended row, choose Edit cohorts. The accessible control names the colleague, for example Edit cohorts for Jamie Reed.
- In Cohort assignments for [name], use Find year groups and classes.
- Review Year groups, Registration / tutor groups and Teaching classes. Select only the groups needed for the colleague’s duties.
- Read the source state. Suggestions unavailable is different from no groups being needed. Explicit selections can still be saved where permitted, but source reset is unavailable without a source.
- Use Clear selections only when assigning no cohorts is intended. Existing broader access remains; clearing this list is not a complete removal of all pupil access.
- Choose Save assignments and wait for Assignments saved. or the resulting saved state.
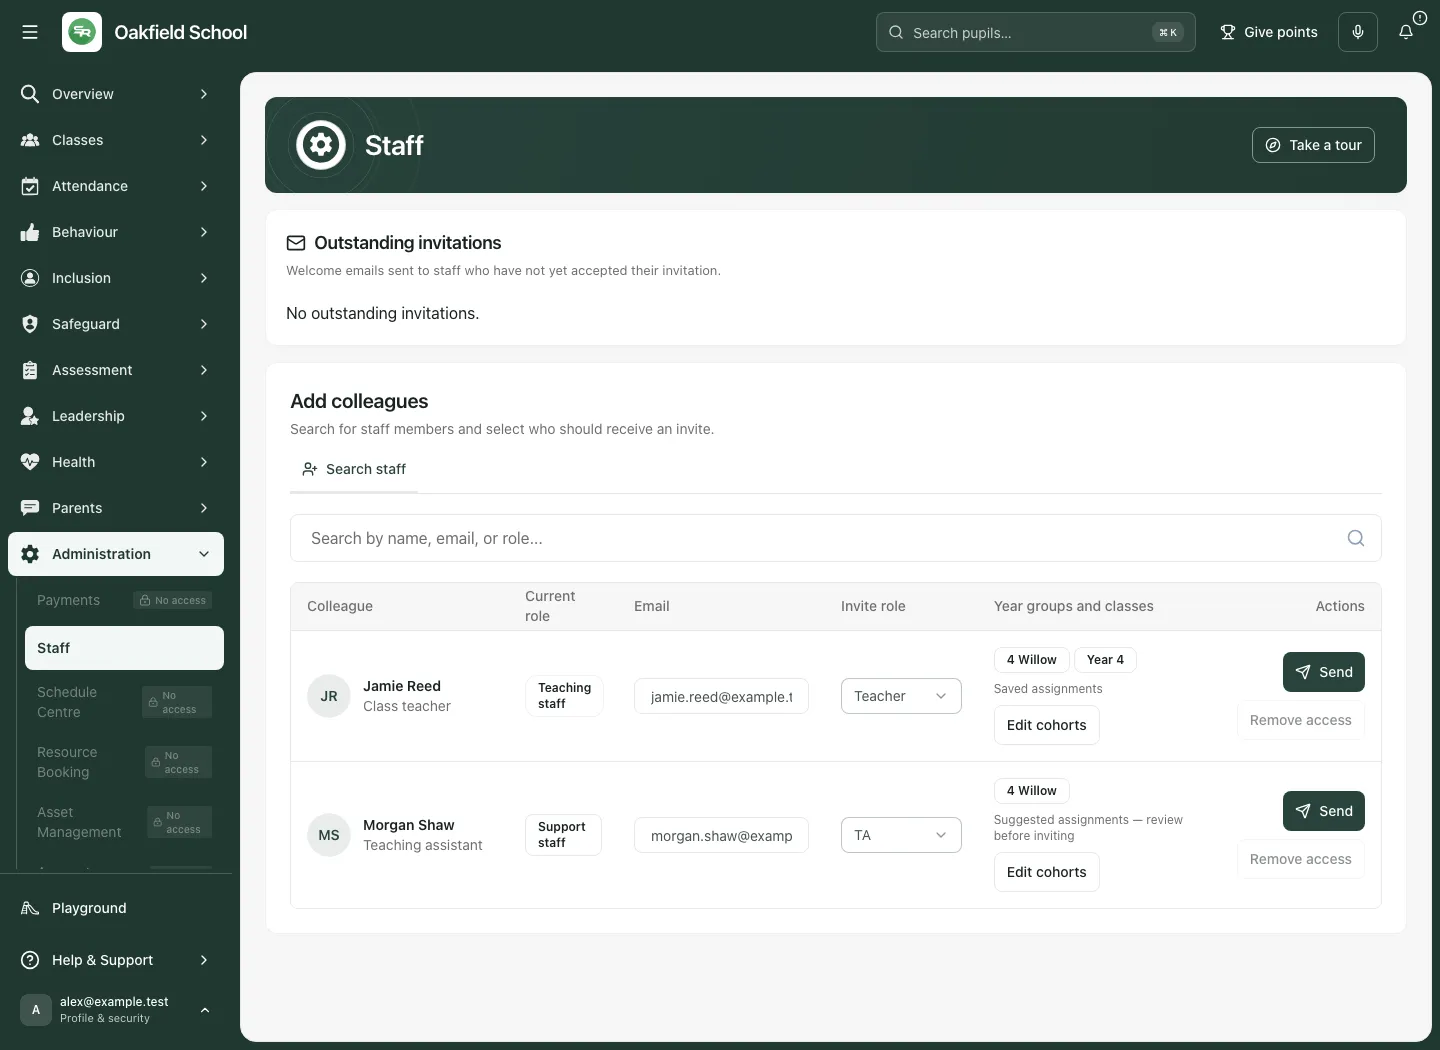
- Reopen the colleague or reload the directory and check Saved assignments and the selected groups.
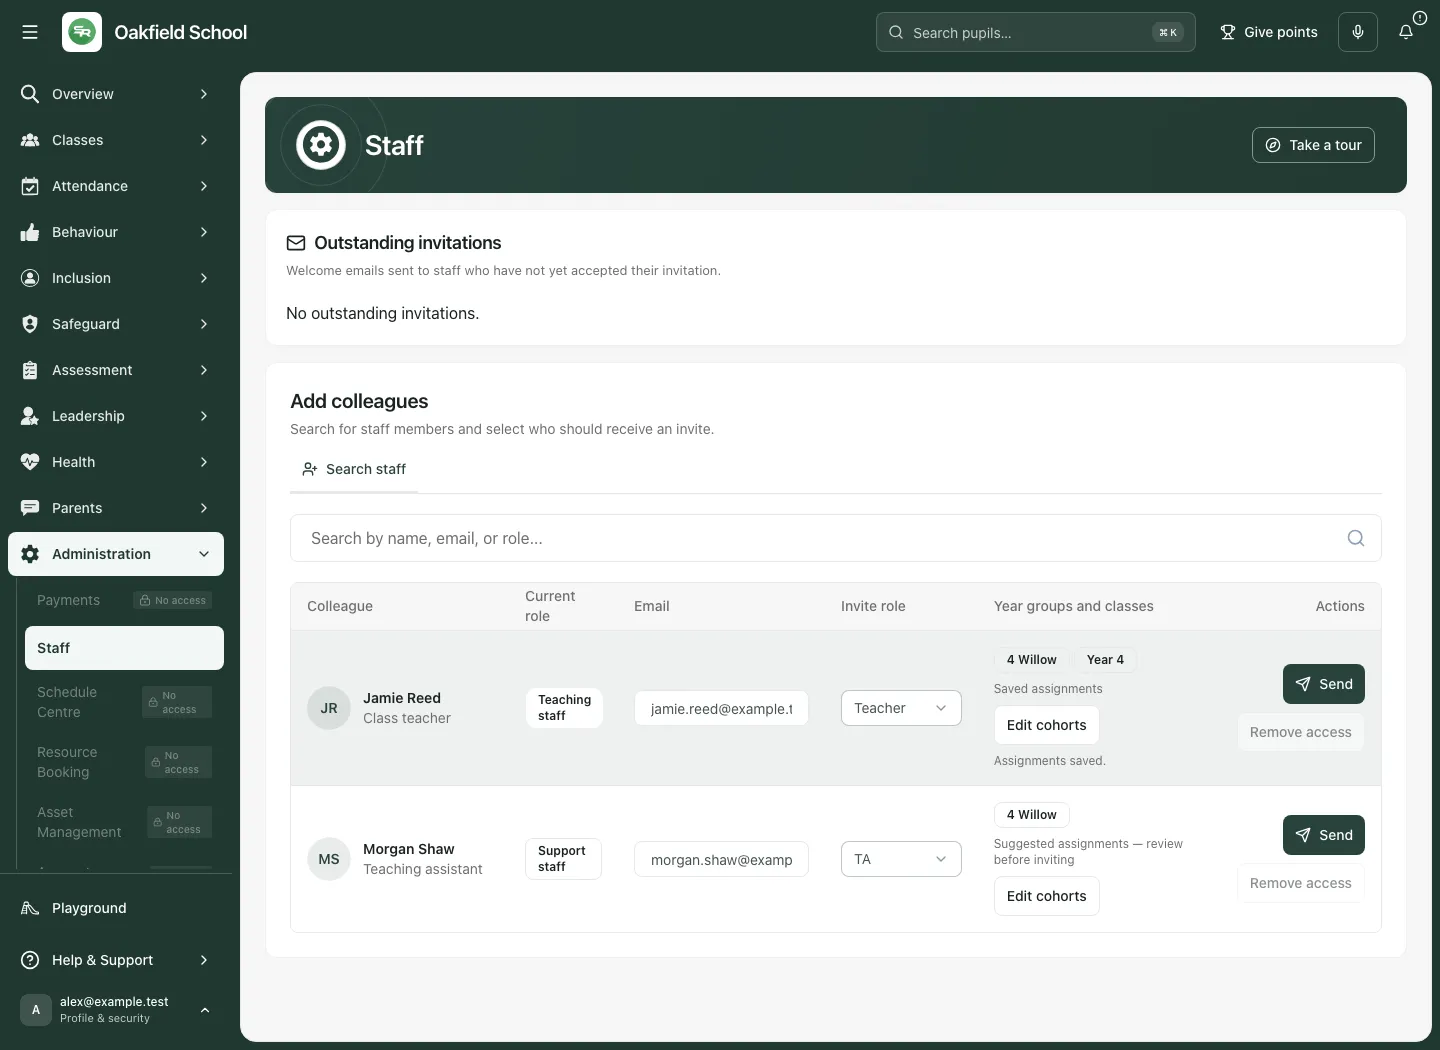
Saved choices are preserved through later imports; pupils follow their current group membership. Reset to Wonde or the equivalent source-labelled reset restores current source suggestions. Review the impact before resetting. A colleague can also have broader access from an existing role or another permission; the displayed warning matters when deciding whether this is sufficiently narrow.
Handle a changed or uncertain save
Section titled “Handle a changed or uncertain save”If another person changed assignments, reload/review the latest selections before saving again. If the last save has an unknown outcome, use Retry save unchanged to confirm the same operation. Do not make another different change or send an invitation while that save is unresolved. The school/context can also change; reload before editing in a different school.
4. Choose an invitation role and send deliberately
Section titled “4. Choose an invitation role and send deliberately”- Find the correct staff row and check the work email. Correct an unlocked invalid/missing email using the permitted field before sending.
- Choose Invite role matching the actual duty. Do not use an elevated role just to reveal an unrelated page.
- Review and save the intended Year groups and classes. If cohort assignments could not load, invitations remain blocked until they can be reviewed.
- Recheck the person, address, role and scope immediately before using Send.
- Read the actual outcome. A request accepted by the invitation service, an email accepted for delivery, a pending invitation and an accepted account are different states.
- If the row says Update, first check whether a real change is needed. When someone already has a login at the same role, Nothing to send directs you to User Management to change what they can do. Do not repeatedly resend an unchanged account invitation.
- Follow a refused, expired or approval-required result through its offered next action. Do not assume an error means the command did not apply.
Elevated roles have additional grant rules and can need an approval route. The available role list depends on the viewer. Choosing a role does not override the server’s current authority checks. For detailed capability management use the school’s Access area; ask the authorised access owner to review the specific duties.
5. Follow outstanding invitations and retry safely
Section titled “5. Follow outstanding invitations and retry safely”Outstanding invitations lists welcome emails for staff who have not accepted. Read the destination, intended role, sent time and expiry where shown. Load more when available rather than assuming the initial list is exhaustive.
- Do not send a second invitation simply because a colleague has not accepted yet. Check the existing state and whether the address is correct.
- An expired invitation needs the supported replacement/review route; it is not a live sign-in link.
- Where the page offers retry for a recorded uncertain command, retry that same request. Do not change the role/email under an in-flight or unresolved send.
- After acceptance, review the linked account and actual access. A sent email does not prove the colleague can see the intended school/pupils.
- In Demo School, write actions can open a demonstration prompt rather than send a real invitation.
6. Add or edit staff in a manually maintained school
Section titled “6. Add or edit staff in a manually maintained school”MIS-connected staff records belong to the MIS. Manually maintained schools show additional controls to authorised staff; they are not available merely because you can view the directory.
Add the directory record
Section titled “Add the directory record”- Choose Add staff member.
- Enter the required name fields, Work email, Job title and Teaching staff setting.
- Choose Add staff member and check the resulting directory entry.
- Invite them separately only when they need account access. Adding a record does not create a login or send an email.
Edit details
Section titled “Edit details”- Open Edit for the correct manually maintained record.
- In Staff details, review the name/contact/job fields, Start date and Teaching staff setting.
- Choose Save changes and wait for the confirmed result.
- Reopen/check the saved details before making a different change. For an uncertain answer, use Retry same change rather than starting a fresh command.
If only the first 1,000 records can be edited/shown as leavers, the page states the limit. Contact support for the rest rather than assuming those staff do not exist.
7. Leaving, re-joining and school account access
Section titled “7. Leaving, re-joining and school account access”Employment status and account access are separate. A leaver can still have a login until school access is explicitly removed.
Record leaving
Section titled “Record leaving”- In the manual staff editor choose Record leaving.
- Enter Leaving date, Reason and any required/appropriate note.
- Read What leaving changes, including current class/working arrangements identified by the review.
- Choose Record leaving and read the saved result; use Done when finished.
- Review Former staff who can still sign in or the leavers card. Do not assume recording the employment change removed their login.
Undo or re-join
Section titled “Undo or re-join”Use Undo leaving only for correcting an erroneous leaving record. Use Re-join for a new period of employment, review Start date and the required note, then confirm the named action. Current School Settings/class arrangements may need separate review. Neither route should be treated as automatically restoring every earlier permission.
Remove school access
Section titled “Remove school access”- Find the named person in the current/former staff area and choose Remove access.
- Read the confirmation: Remove school access for [name]? Their access to other schools and shared sign-in will be preserved.
- Confirm only when the intended school relationship should end.
- Wait for School access removed and review the current list. A removed school relationship is different from deleting the person’s shared identity or other schools’ access.
Do not use a broad account deletion as a substitute for removing one school’s access.
8. Pay and contract terms
Section titled “8. Pay and contract terms”The Pay and contract card is restricted to the headteacher/SENCo with the relevant read permission. General directory access does not reveal salaries. Editing has its own authority.
- Read coverage: salary recorded, FTE known, annual cost available and pay-band coverage. Missing values remain blank; they are not zero cost.
- Search by staff name/role and open Edit pay and contract for [name].
- Review the MIS baseline and manual values. Manual values take precedence for costing; they do not change the MIS record.
- Enter Full-time annual salary (£), FTE, Contracted hours per week and Weeks worked per year. Review Pay band for provision costing and Note (optional).
- Choose Save pay and contract, then check the saved source badges and calculated values.
- Choose Not in a band only when the colleague should deliberately belong to no provision-costing band. Conflicting MIS band fields require review, not an invented default.
The card explains annual salary cost as full-time salary × FTE and hourly salary cost as annual salary cost ÷ (hours per week × weeks worked per year). Read the displayed exclusions. A cost remains blank until every required value is known; it is not a payroll calculation or a complete employment-cost statement.
9. Alternative provision: staff and access
Section titled “9. Alternative provision: staff and access”AP schools use Staff and access with a clearer separation between a directory record and account invitation.
- Add the staff record through Add staff member when authorised. This does not create a login or send an email.
- Check Invite role and Class access, then choose Review invitation for the named person.
- In Review staff account invitation, use the preview’s review control and read the permitted pages/duties, scope and any blocked/elevated changes.
- If anything changes, review again. Send reviewed invitation remains disabled until the current proposal is ready and your permission is valid.
- Choose Send reviewed invitation, then follow the actual result/approval state.
Where the provision is operational and you have both staff-directory-link read and schedule-availability management authority, the colleague’s working-hours control opens the AP working-hours dialog:
- Check the selected staff identity and school time zone. This is a weekly school-local pattern, not a set of effective-date exceptions.
- Use Add interval for each working day and enter its start/end in HH:MM. Review whole intervals; a session must fit completely within the hours.
- Use Remove for an unwanted interval. Clear week records no working hours and prevents normal rota allocations; it does not mean unrestricted availability.
- To reuse school defaults, use Apply default hours to…, select days and confirm Apply to N days. The chosen days are replaced locally; save to keep them.
- Choose Save working hours. Changes apply from today and existing assignments are retained; check the confirmed saved pattern before closing.
- If a save is uncertain, use the offered same-change retry. Choose Close only after checking the result.
This is scheduling availability, not an account role or a salary record. A staff name without a verified account link cannot be treated as a schedulable account.
Troubleshooting
Section titled “Troubleshooting”A staff member is missing. Check search, displayed-row limit, current/former status, school and source sync. Deleted/internal support accounts can be intentionally excluded from school lists.
Cohort suggestions are unavailable. Ask the authorised owner to review explicit selections. Do not assume unavailable suggestions mean no access is required.
An invitation is blocked by assignments. Load and save the current cohort decision first. An unresolved/uncertain save must be confirmed before sending.
An email is locked. The colleague may already have an account or a sent invitation. Use the supported account management process instead of overwriting an identity link.
Nothing to send appears. The account already has the chosen role. Use User Management/Access for an actual permissions change.
A colleague receives too much or too little pupil access. Review role, cohort assignments and any broader existing grants together. Changing one list does not automatically revoke all other authority.
The pay card is missing. It is restricted by role and exact permission. Do not copy salary details into a general staff note.
A leaver can still sign in. Employment and school account access are separate; use the named Remove access process with authority.
Questions schools often ask
Section titled “Questions schools often ask”Does adding a staff record invite them? No. Directory creation and invitation are separate.
Do suggested cohorts count as reviewed? No. Save the deliberate selection before inviting where required.
Does clearing cohorts remove all access? No. Existing broader role/permission access is preserved and must be reviewed separately.
Does Sent mean accepted? No. Follow invitation and account acceptance states separately.
Does removing access delete their other schools? The school-removal confirmation preserves other schools and shared sign-in.
Do manual pay values update the MIS? No. They take precedence for the school’s costing view; the MIS record remains separate.
Related guides: Connect and Schedule Centre.