Build, save and teach from a lesson plan
Written for: Teachers and staff who prepare lessons.
Set teaching intent, build a timed sequence, add assessment checks and resources, then save and review the plan for teaching.
The page is titled Lesson Planner. It is a teaching-planning workspace; adding a lesson plan does not itself book an event in Calendar, record attendance or prove that the lesson was taught.
The screenshots use a fictional Year 5 fractions lesson. The demonstrated manual plan editor has its own Save, Teach Mode and Print plan actions. Plans opened from another saved source can show the source’s own preparation/teaching view; preserve that source relationship rather than creating an unrelated duplicate.
Before you start
Section titled “Before you start”Check your school, class, lesson and source. You need access to Lesson Planner; generating a teaching pack, using restricted pupil context and opening a saved library source can require additional permissions. A URL or class label is context, not authority to read or alter another plan.
Have a clear learning intention and reliable subject/curriculum source. Know the allotted time, prior learning and what would count as evidence of understanding. Do not put unnecessary pupil identifiers or sensitive records into a resource, prompt or shared teaching slide.
Open and orient yourself
Section titled “Open and orient yourself”- Open the permitted Lesson plans entry, including from the class tools where available.
- Check Lesson Planner, the lesson title and class/year context.
- If arriving from Curriculum Planning, read the programme/unit/approved-edition source shown with the lesson.
- Confirm that the intended plan has loaded before editing. An unavailable saved plan is not permission to use a different class’s draft.
- Review the Lesson intent and Lesson sequence before making changes.
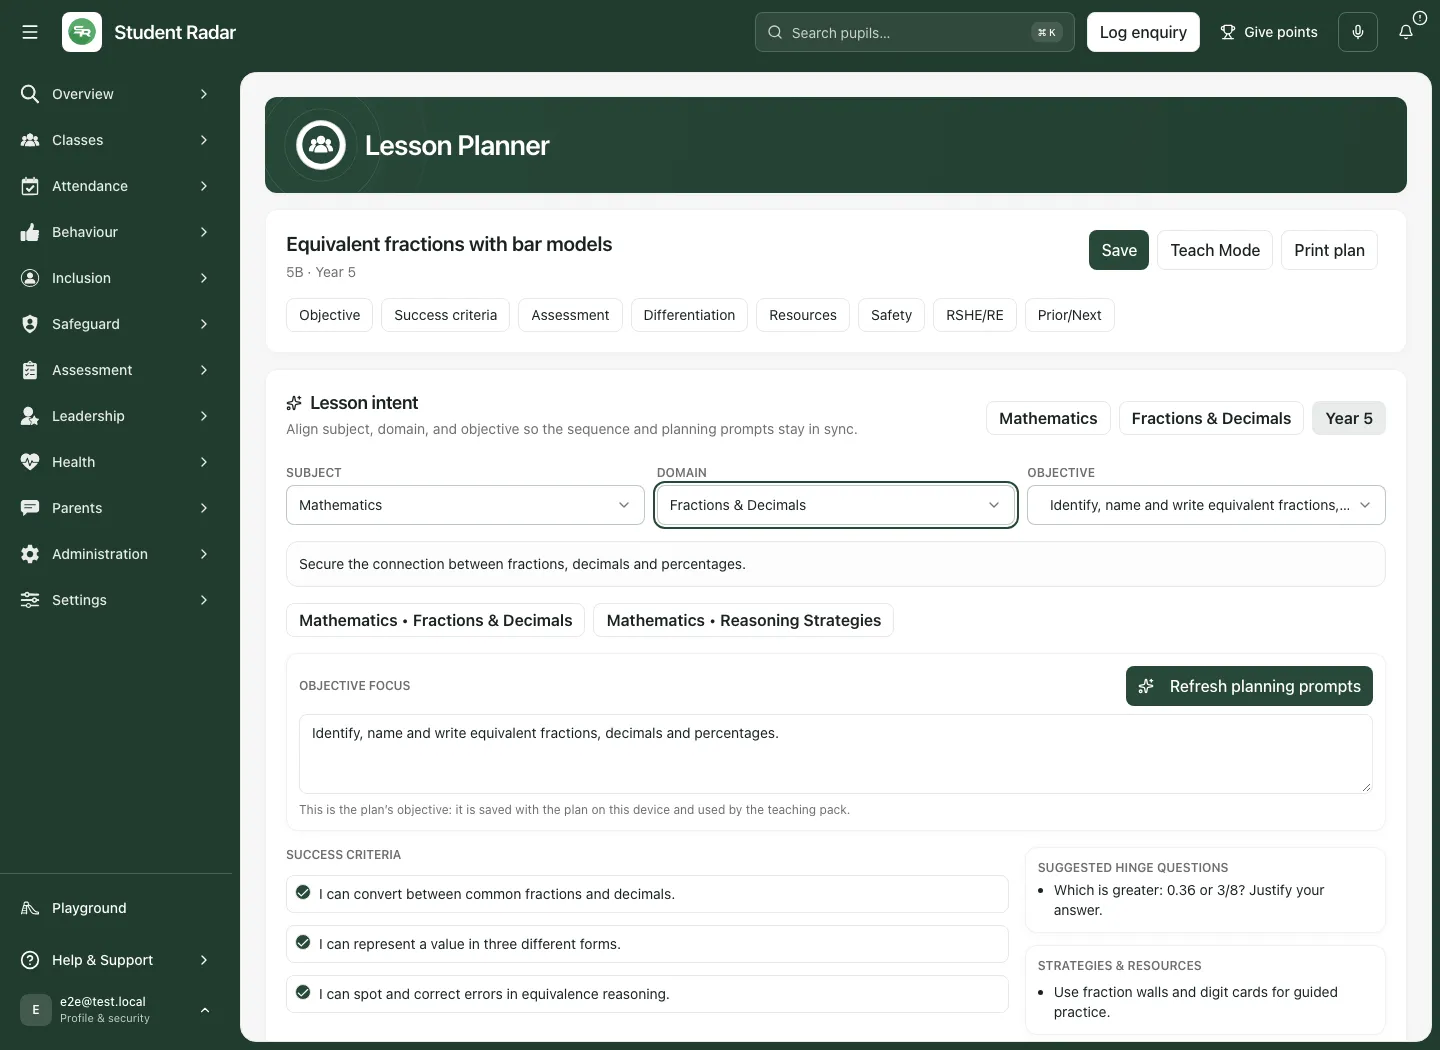
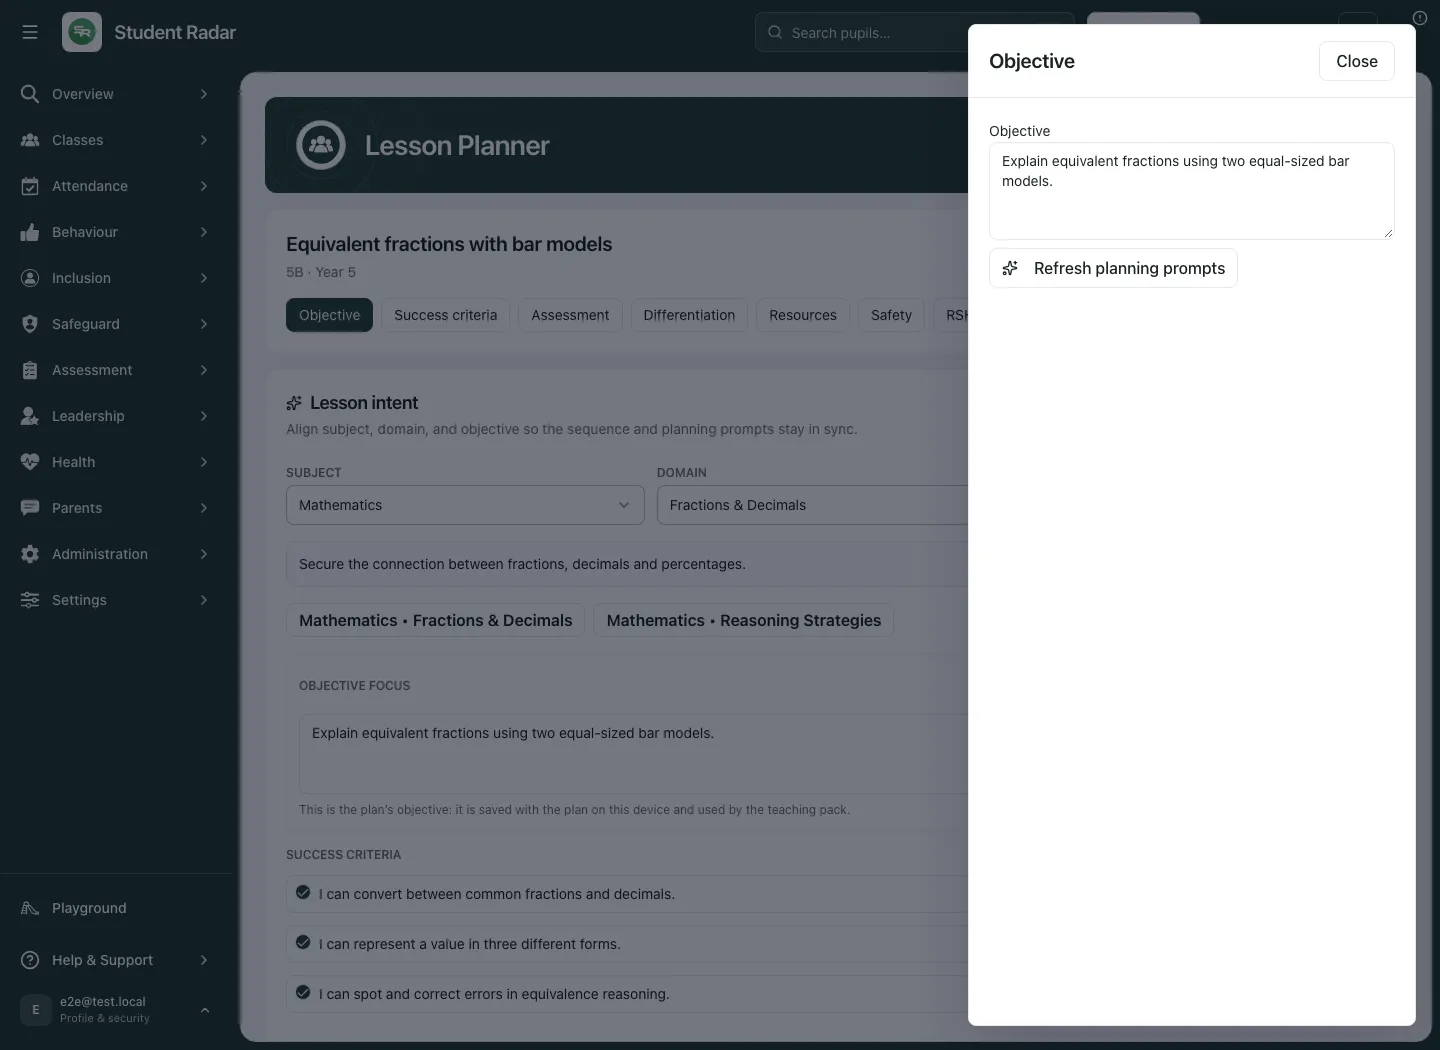
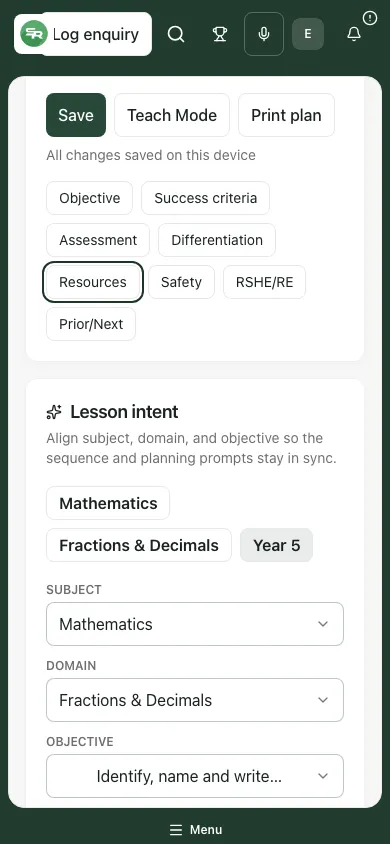
The plan-detail controls are Objective, Success criteria, Assessment, Differentiation, Resources, Safety, RSHE/RE and Prior/Next. They open focused drawers while the sequence stays on the main page.
Align the lesson intent
Section titled “Align the lesson intent”- Under Lesson intent, choose Subject, Domain and Objective appropriate to the lesson.
- Read the selected objective’s statement and domain summary. Do not assume the default selection matches the title of an opened plan.
- Use Objective focus to write the actual intention for this lesson.
- Review the success criteria, hinge prompts and strategy/resource suggestions shown below it.
- Add relevant Intent notes.
- Use Refresh planning prompts only when you intend to request a refreshed set of suggestions, then review their accuracy and fit before using them.
A selected planning objective is not automatically an official statutory source. Check provenance and the relevant curriculum edition. If the objective changes, recheck the criteria, assessment and sequence rather than leaving an old set of checks attached to a new intention.
Edit the objective and success criteria
Section titled “Edit the objective and success criteria”- Select Objective in the detail controls.
- Edit Lesson objective so it says what pupils should learn, not just what activity they will complete.
- Close the drawer to return to the plan. Closing is not a confirmed save.
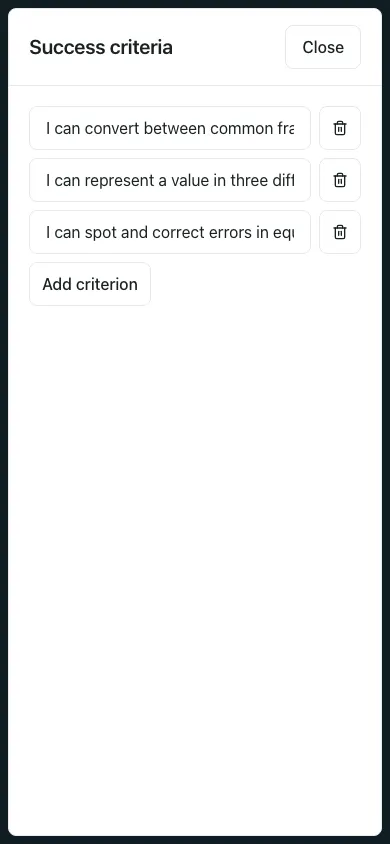
- Select Success criteria and review the numbered criteria.
- Add, edit or remove criteria using the supplied controls. Keep them observable and aligned with the intention.
- Save and verify the plan before relying on the change.
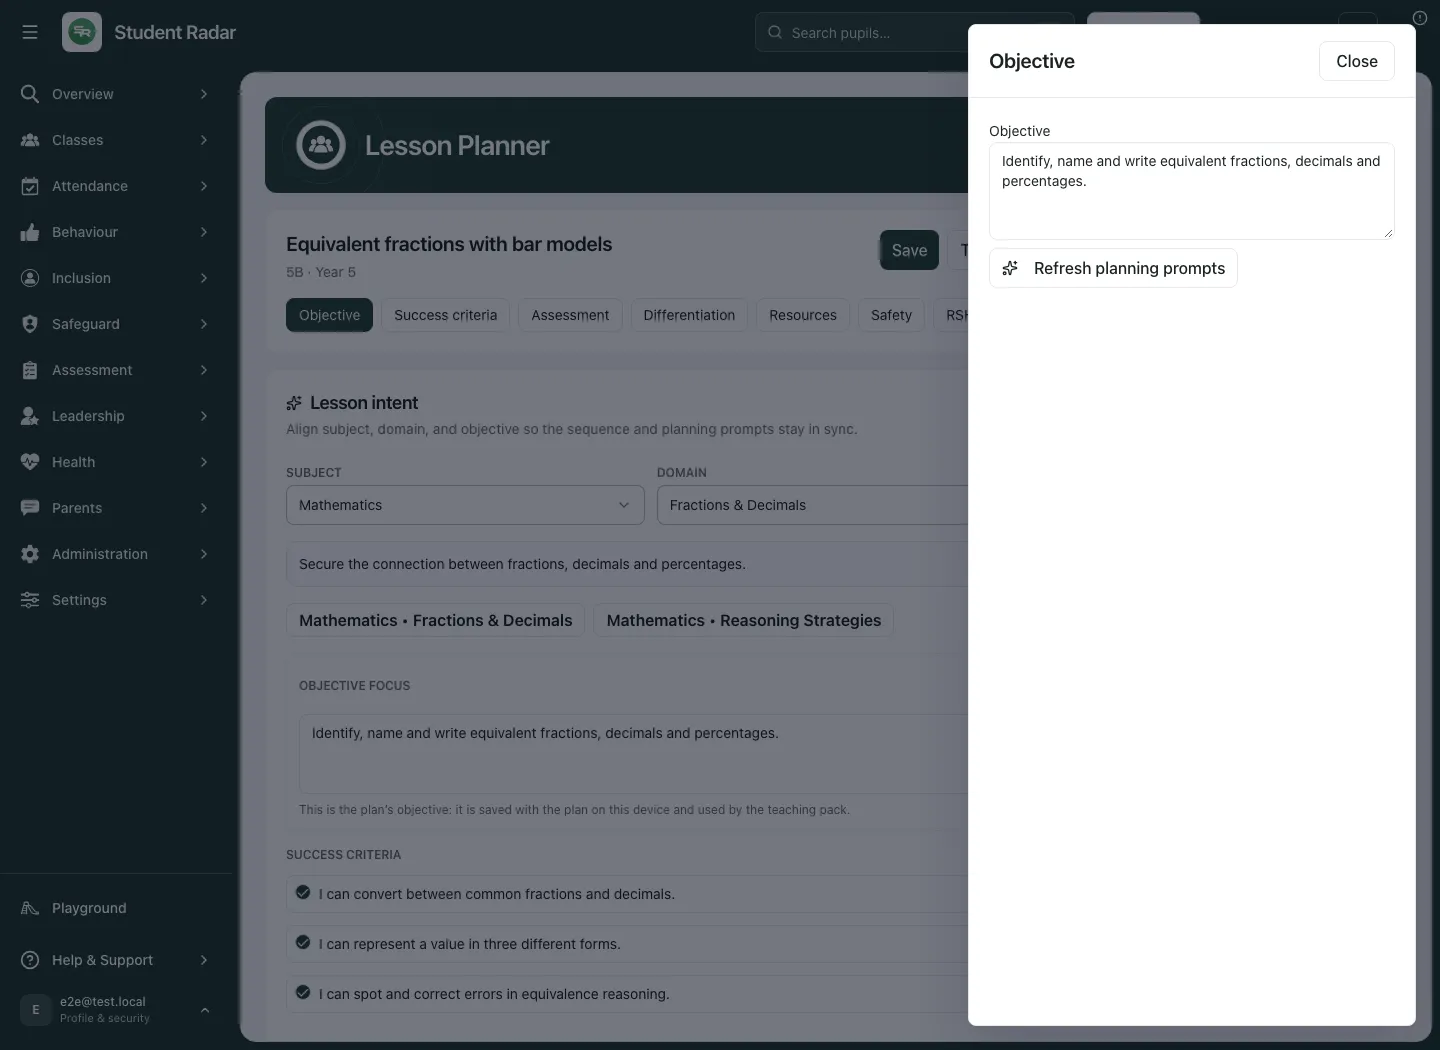
For example, “Explain equivalent fractions using two equal-sized bar models” gives an intended explanation to check. “Complete the worksheet” describes an activity, not the learning itself. Keep a manageable set of criteria and use them when reviewing pupils’ actual work.
Build the timed sequence
Section titled “Build the timed sequence”Set Lesson length (min), then use + DoNow, + Model, + Guided, + Partner, + Independent or + Review to add the phases you actually intend. These are teaching structures, not mandatory stages for every lesson.
- Read each block’s type and duration.
- Add the phases needed for the lesson.
- Use the named Move [phase] block earlier and Move [phase] block later buttons to change its order.
- To change duration, focus the block itself and press Left arrow to shorten it or Right arrow to lengthen it by one minute within its limits. You can also drag the block edge marked Drag to change duration. These duration actions are separate from moving the block earlier/later. Review the linked checks/resources after changing the sequence.
- Compare Total [minutes] / [lesson length] min with the available time. Include transitions and review realistically.
- Remove or adapt a phase that no longer fits the objective, then save.
A 60-minute total does not prove the plan is deliverable. Check the content, routines and opportunities for pupil explanation. Reordering phases can affect which prior knowledge or resource a later phase depends on.
Plan assessment checks
Section titled “Plan assessment checks”Open Assessment to review the lesson’s hinge questions and checkpoints. Suggest checks (3) requests suggestions; inspect each question, answer option and intended criterion before using it. A stem without answer options needs completing rather than being presented as a finished multiple-choice item.
Check how a checkpoint links to the phase and success criterion. Remove an obsolete check with its remove control. If focus-pupil assignments are used, review their linked block/checkpoint after changing the sequence; an old placement is not automatically appropriate for a revised task.
Planning a check is not recording a pupil response. Use the authorised teaching/assessment workflow to capture the actual result and interpret it professionally afterwards.
Plan adaptations deliberately
Section titled “Plan adaptations deliberately”Open Differentiation to review the supported groups and adaptations. The initial All/Most/Some groups are planning structures, not diagnoses or fixed labels for pupils. Use specific approaches such as visual support, chunking, sentence stems, manipulatives, alternative recording, vocabulary preparation or reduced writing where appropriate.
Where the class’s focus-pupil information is available and authorised, check the pupil and current evidence before assigning support or a checkpoint. Missing or unavailable pupil context must remain unknown. Do not invent a need or use browser-provided context as permission to expose a restricted record.
Add resources and link them to phases
Section titled “Add resources and link them to phases”- Select Resources.
- Choose Add resource.
- Enter Resource title and Resource URI and select Resource type: slide, worksheet, manipulative or link. Use an HTTPS address or a valid slide/file reference; invalid references are refused when you leave the field.
- Check the destination/file is accessible and appropriate for the intended audience.
- Under Link to blocks, choose the resource for the appropriate sequence block.
- Remove an unintended resource with its named remove control.
- Close the drawer, save and check the resulting plan.
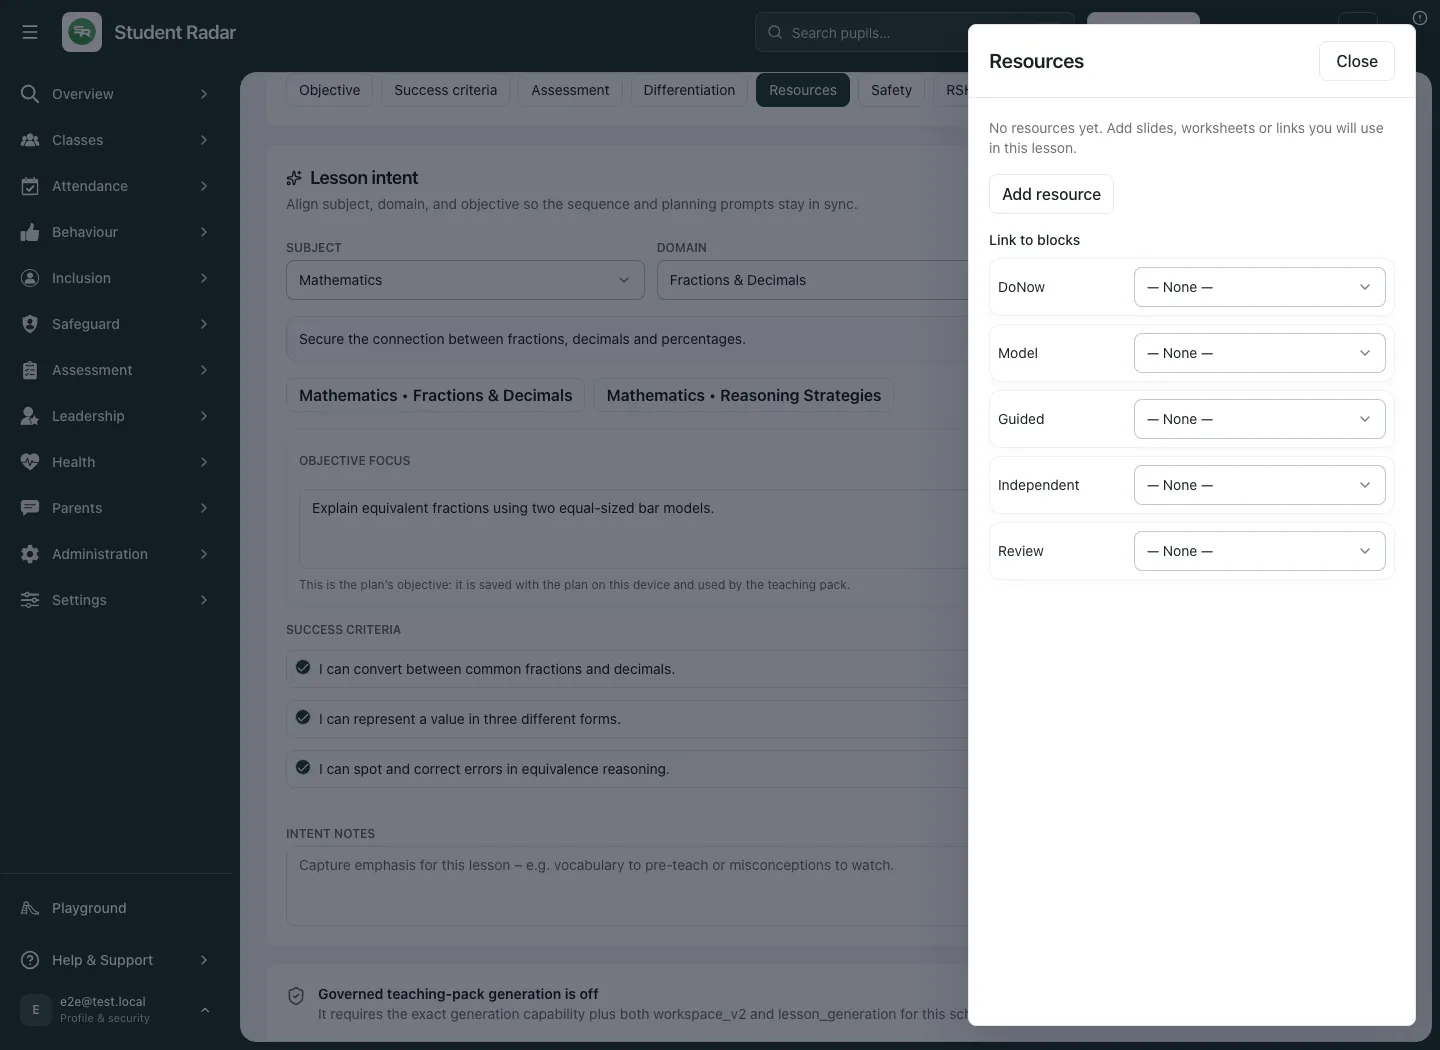
A resource link is a reference, not proof the content is available to every pupil or safe for the activity. Check it before teaching. Teach Mode may need to prepare the resources; an unavailable resource should be resolved before relying on it in a live lesson.
Safety, sensitive content and learning context
Section titled “Safety, sensitive content and learning context”Use Safety for practical hazards and control considerations relevant to the actual activity. Review guidance against the real room, equipment, pupils and school procedures; a planning suggestion is not a completed risk assessment.
RSHE/RE provides the supported flags/context for those subjects. Check curriculum and school requirements before delivering sensitive material. Prior/Next connects this lesson with what pupils need beforehand and what follows. These fields should explain the sequence rather than fabricate past attainment or future impact.
Save, check and reopen
Section titled “Save, check and reopen”- Select Save.
- Wait for the result and read the actual status or toast.
- Distinguish a locally saved draft from the relevant shared school/source record. A message saying the change is on this device does not prove it is available on another device.
- Reopen the same plan and inspect the changed objective, criteria or resource.
- If saving fails, keep the draft open and follow the message before leaving.
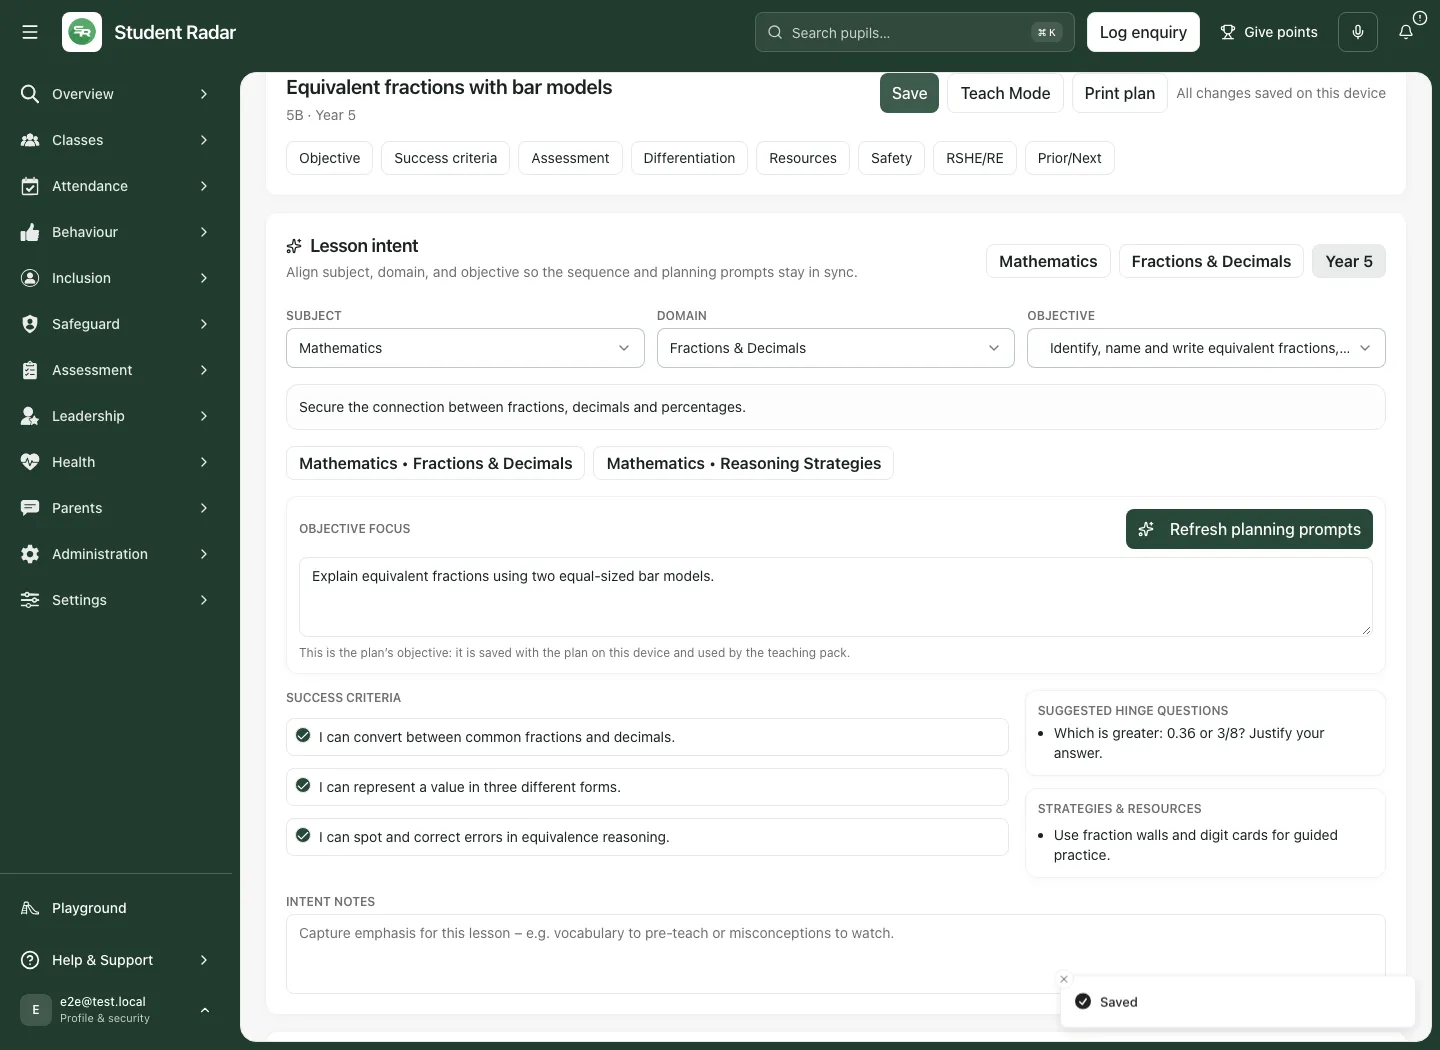
Changes can be kept locally during preparation. Keep the same school/account context and do not rely on an old browser draft after switching users or schools. If a saved source is unavailable, use its retry/source action rather than copying sensitive details into another plan.
Prepare a governed teaching pack when available
Section titled “Prepare a governed teaching pack when available”Generation is a separate action with its own access and school availability. If the page says it is unavailable, ask the school’s administrator or continue preparing the manual plan; do not assume a disabled panel can generate resources.
- Check the selected objective/source and class.
- Open the available Generate teaching pack controls.
- Read the primary objective/excerpt and confirm it is the curriculum source you intend to use.
- Add only relevant supporting source excerpts with clear labels, within the displayed limits.
- Review the intended class adaptation context. Where offered, deliberately choose a permitted de-identified SEND teaching profile or Generate a generic pack without class/pupil context.
- Review the practical/sensitive-content risk acknowledgement. Generated safety guidance does not replace professional review.
- Select Generate teaching pack only when you intend the request, then wait for its actual status. A running request is not a completed pack.
- Open the resulting reviewed draft in Prepare, inspect accuracy, sequence, resources, adaptations and risks, and make the authorised decisions before teaching.
Do not retry a pending request merely because the panel changed. Follow its current status/recovery controls. Imported older drafts and saved library sources retain their own provenance; review their source and version rather than treating a generated output as approved curriculum evidence.
Teach or print the reviewed plan
Section titled “Teach or print the reviewed plan”Use Teach Mode when the plan and resources are ready. The app prepares the current supported plan/resources; read any failure before leaving the planner. Opening Teach Mode does not establish that the lesson was delivered or a pupil learned the content.
Use Print plan to open the supported print layout. Check the title, class, objective, sequence and resource list before printing or sharing. A printed copy is a snapshot and does not update when the digital plan changes. Choose an appropriate audience for any pupil-specific adaptation detail.
Work on a phone
Section titled “Work on a phone”The detail controls wrap on a phone; open one drawer at a time and check the field before editing. Scroll the lesson sequence to review the phases and total time. Save and verify the outcome before leaving, particularly after changing a drawer field.
Troubleshooting
Section titled “Troubleshooting”| What you see | What to do |
|---|---|
| Account/school still being verified | Wait or sign in as instructed; do not reuse another context’s draft. |
| Plan unavailable | Retry or return to its authoritative source. |
| Objective doesn’t match the lesson | Select the correct domain/objective and review all linked criteria/checks. |
| Total time does not fit | Adjust phase durations/order and review realistic teaching time. |
| Focus-pupil or class context unavailable | Keep it unknown and check the source/permissions before adding individual context. |
| Save failed or local save failed | Keep the plan open, check storage/connection and retry as instructed. |
| Teaching resources unavailable | Resolve the resource links before relying on Teach Mode. |
| Generation unavailable | Check school/account eligibility; continue manual preparation where permitted. |
| Generation still running | Follow the existing request status rather than creating duplicate work. |
Frequently asked questions
Section titled “Frequently asked questions”Is Lesson plans the school Calendar? No. This page prepares teaching content; scheduling has its own workflow.
Does a local save mean colleagues can open the plan? Do not assume so. Check the actual saved source and shared-state confirmation.
Does refreshing prompts approve the objective? No. Staff review suggestions against the intended curriculum source.
Does Teach Mode prove delivery or learning? No. Record and review actual evidence separately.