Prepare school forms and review collected responses
Write and preview the form, publish the reviewed version and check responses through their review and next action. A saved draft, a published form, a published campaign and an accepted response are different things. Keep checking the status of the item you are working on.
The fictional example is a library visit consent form. A consent response does not itself approve a trip, update a medical record or confirm payment. Use the owning area for those decisions.
1. Before you begin
Section titled “1. Before you begin”Open Forms from the school workspace. Your access may let you read forms, create or edit drafts, publish, review responses, manage campaigns or administer integrations. These are separate permissions. Owners, managers, editors and viewers can have different controls for the same form. A link to a form does not give someone permission to manage it.
Agree the purpose, recipients, wording, closing date, response review and follow-up owner before building. Ask only for information the school needs. Choose the appropriate data classification, especially for health information and other sensitive answers. Plan who will check incoming responses and what they should do when someone needs help.
The builder depends on the form version and the school’s enabled features. Existing forms may use the simpler section-and-question builder shown below. Newer forms can include richer question types, explicit sharing settings, structured output, rules and reporting. Do not assume a control is available because it appears in another school’s screenshot.
2. Find or start a form
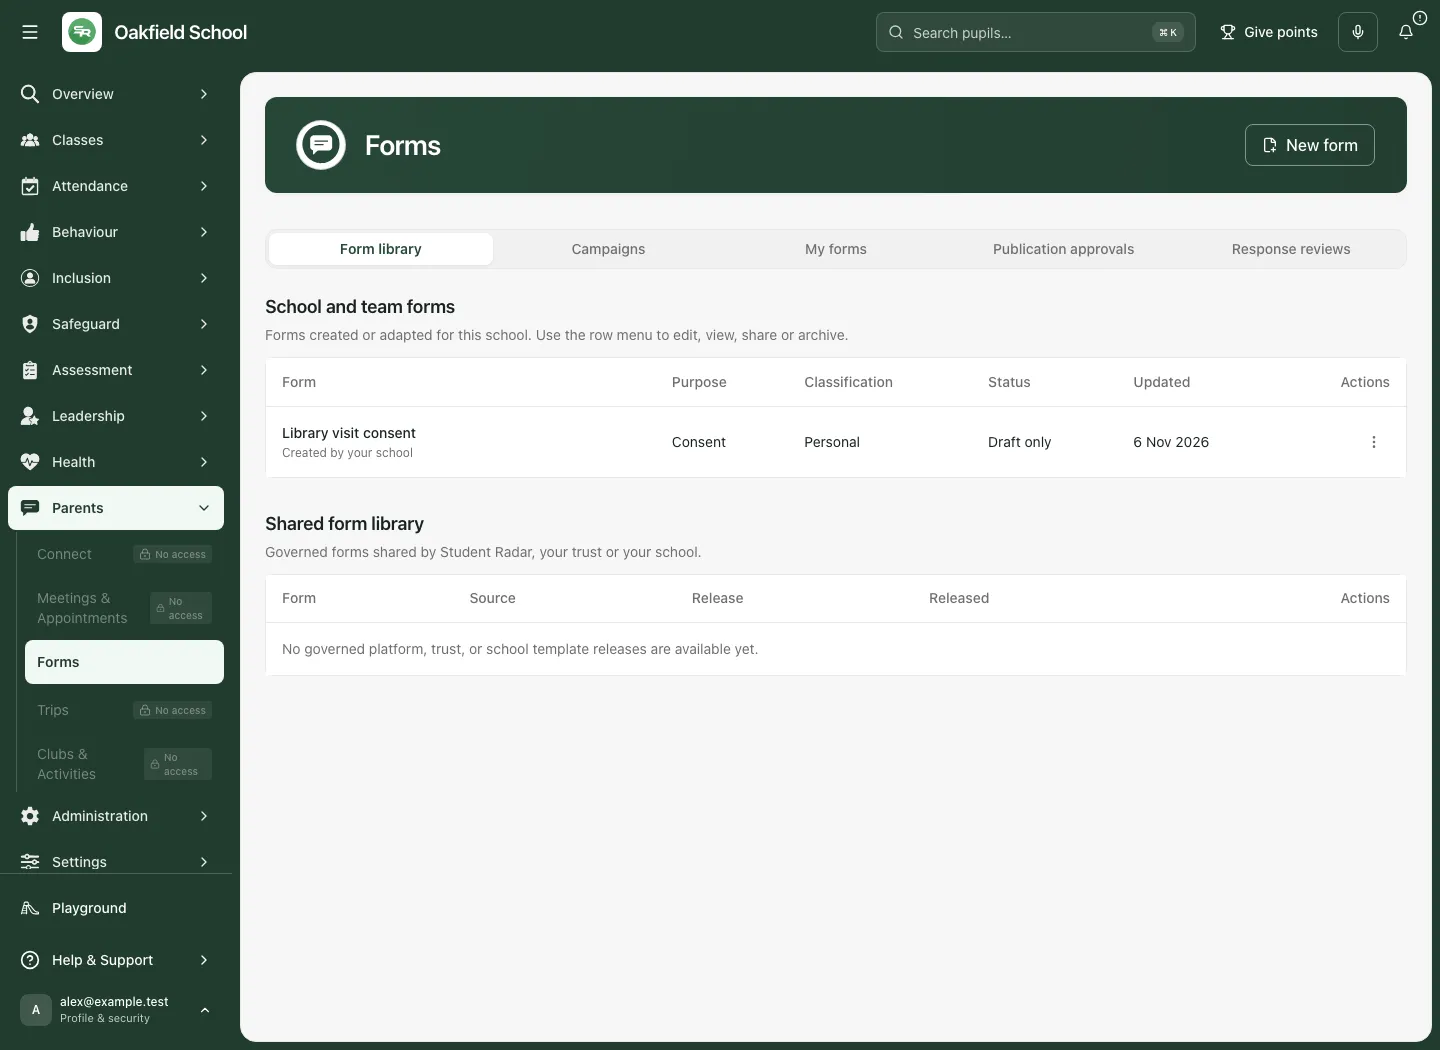
Section titled “2. Find or start a form”- Open the Forms library and read the title, purpose, classification, draft/publication state and published version information.
- Use the action menu for the required form. Choose Edit form, or View form when you have read access only. Check the title before changing anything.
- To start a form, choose New form and choose a starter. The catalogue includes Blank form, Simple consent, Trip consent, Medical information, Photo consent, Club application, Survey and Policy acceptance.
- Replace example wording. Templates are starting structures, not approval of the school’s intended use. Consent and sensitive templates can require elevated publishing approval.
- If using the shared form library, read the published template release and the clone/upgrade choice. A school copy and a later template release are not the same revision; review changes before adopting them.
3. Write the form and organise its questions
Section titled “3. Write the form and organise its questions”- In Build, enter Form title and Introduction. Tell recipients what the form is for, the relevant date and how to ask a question.
- Check Purpose and Data classification. An active form’s purpose may be locked. Do not change the title to disguise a different use of an established form.
- Enter each Section title and Section description. Use Add section for a new topic.
- Use Add question, write the Question label, select Question type and add Help text when useful. Set Required question only when the answer is necessary.
- For choices, replace every option with the intended answer. For text, set suitable minimum/maximum character limits; for dates, check earliest/latest dates where needed.
- Use the move controls to change question order. Review conditions after moving or removing a question, particularly when another question depends on its answer.
- Choose Create draft for a new form or Save draft for an existing one. Wait for confirmation before leaving. Publishing uses the saved form, so finish and save edits first.
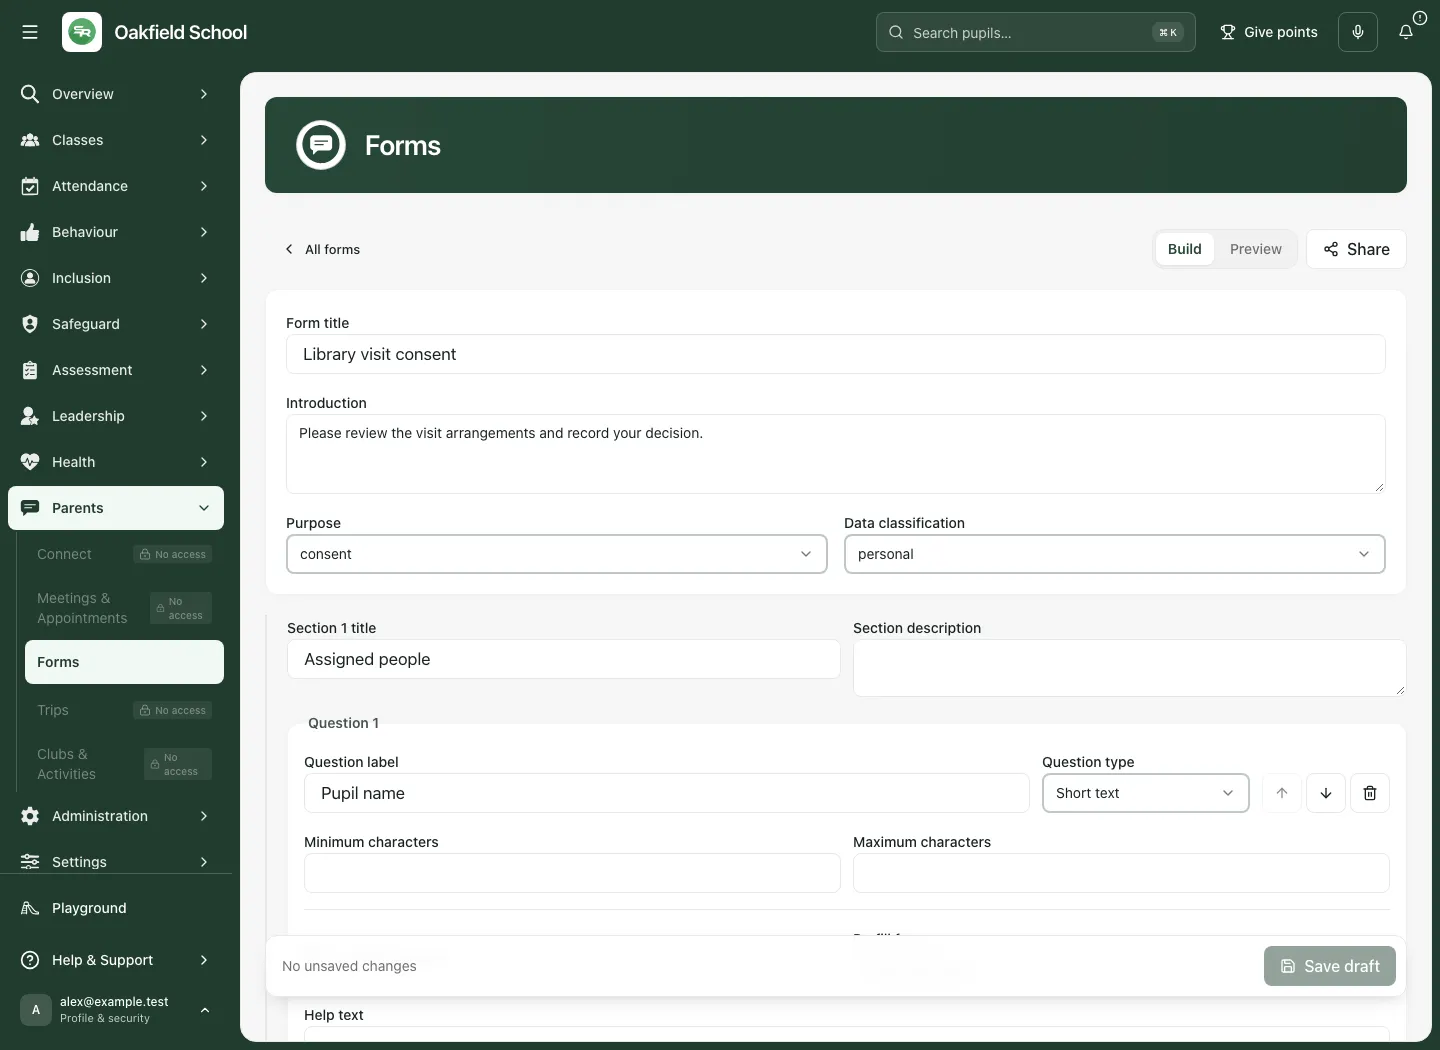
The simpler builder supports Single choice, Multiple choice, Short text, Long text, Yes or no, Date, File upload, Declaration and Signature. For declarations and signatures, review Declaration wording carefully: the exact published wording is bound to the response receipt. Allow a drawn signature is an additional choice, not a substitute for the declaration.
Use Prefill from where available to bring in trusted pupil, parent/carer or staff context. Check the person before relying on prefilled information. A prefill does not authorise someone to answer for another person.
Richer questions in newer forms
Section titled “Richer questions in newer forms”Newer schemas also support number, currency, email, phone, address, time, date/time, rating, matrix, repeating group and guidance content. Choose the type that matches the information rather than collecting everything as unstructured text.
- Select the question and use Edit where the compact editor is shown.
- Set Question label, Question type and help text. Use Move to section if it belongs elsewhere.
- Review Structured output key. Keep it stable after publication: a changed label or translation should not silently change what downstream users receive.
- Complete type-specific settings: matrix rows/options, repeating field labels and output keys, number ranges, item counts or file policy.
- For files, set allowed types and Maximum per file (MB), Maximum files and Maximum total (MB) within the platform limits. A configured field does not bypass scanning or evidence access checks.
- Check Trusted prefill and Prefill handling where provided. Read-only and editable handling serve different purposes.
- Save, preview and test both ordinary and boundary answers before requesting publication.
4. Add conditions and preview every path
Section titled “4. Add conditions and preview every path”- In the simpler builder, choose Add condition on the question that should appear conditionally.
- Select an earlier question, the comparison and the value. Only use a condition that makes sense for that answer type.
- Decide whether all or any of the conditions must match where the condition editor offers that choice.
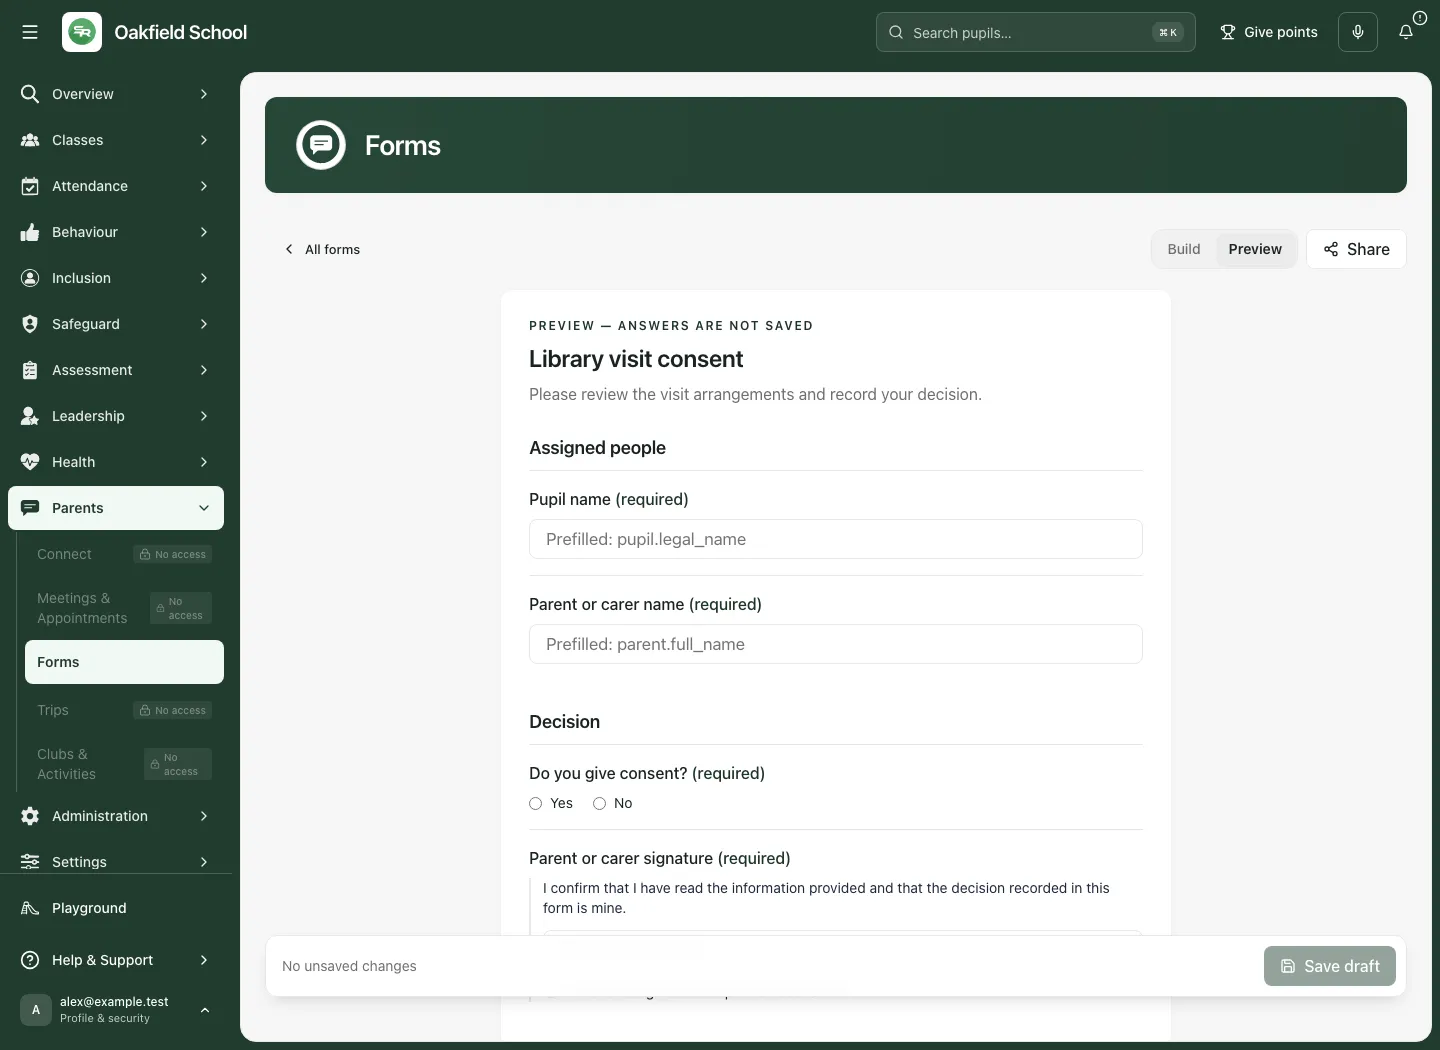
- Open Preview and answer the earlier questions in each relevant way. Check both the shown and hidden paths, required fields, declarations and the final wording.
- Return to Build, correct problems and save again. Preview is a rehearsal; it is not a recipient response or a published campaign.
In schools with the newer builder:
- Open Rules and branching and choose Add rule. There must be at least two sections and one field for a forward rule.
- Enter Rule name, choose Evaluate after section, then set Match and the answer conditions. Use Add condition for another comparison.
- Under Then, choose Show a field, Require a field, Show a section, Skip to a section or End the form and select the permitted later target/outcome.
- Use Add action where needed and the rule move controls to put the rules in the intended order.
- Save and preview every branch, including the route where the condition does not match.
The rules area can control later questions/sections and the end of a form. Keep source questions before their targets. Moving a rule or question can change which answers it can use. Review the displayed validation summary; do not publish a broken or unreachable route. Rules are distinct from response workflows, which act after submission or review.
5. Save and reopen the draft
Section titled “5. Save and reopen the draft”- Finish the current edits and choose Save draft.
- Wait for the save result. If there is an error, keep the editor open and read the explanation before retrying.
- Return to All forms. Open the same form’s action menu and choose Edit form.
- Check the title and the detail you changed. Continue from the confirmed saved version rather than a second open browser tab.
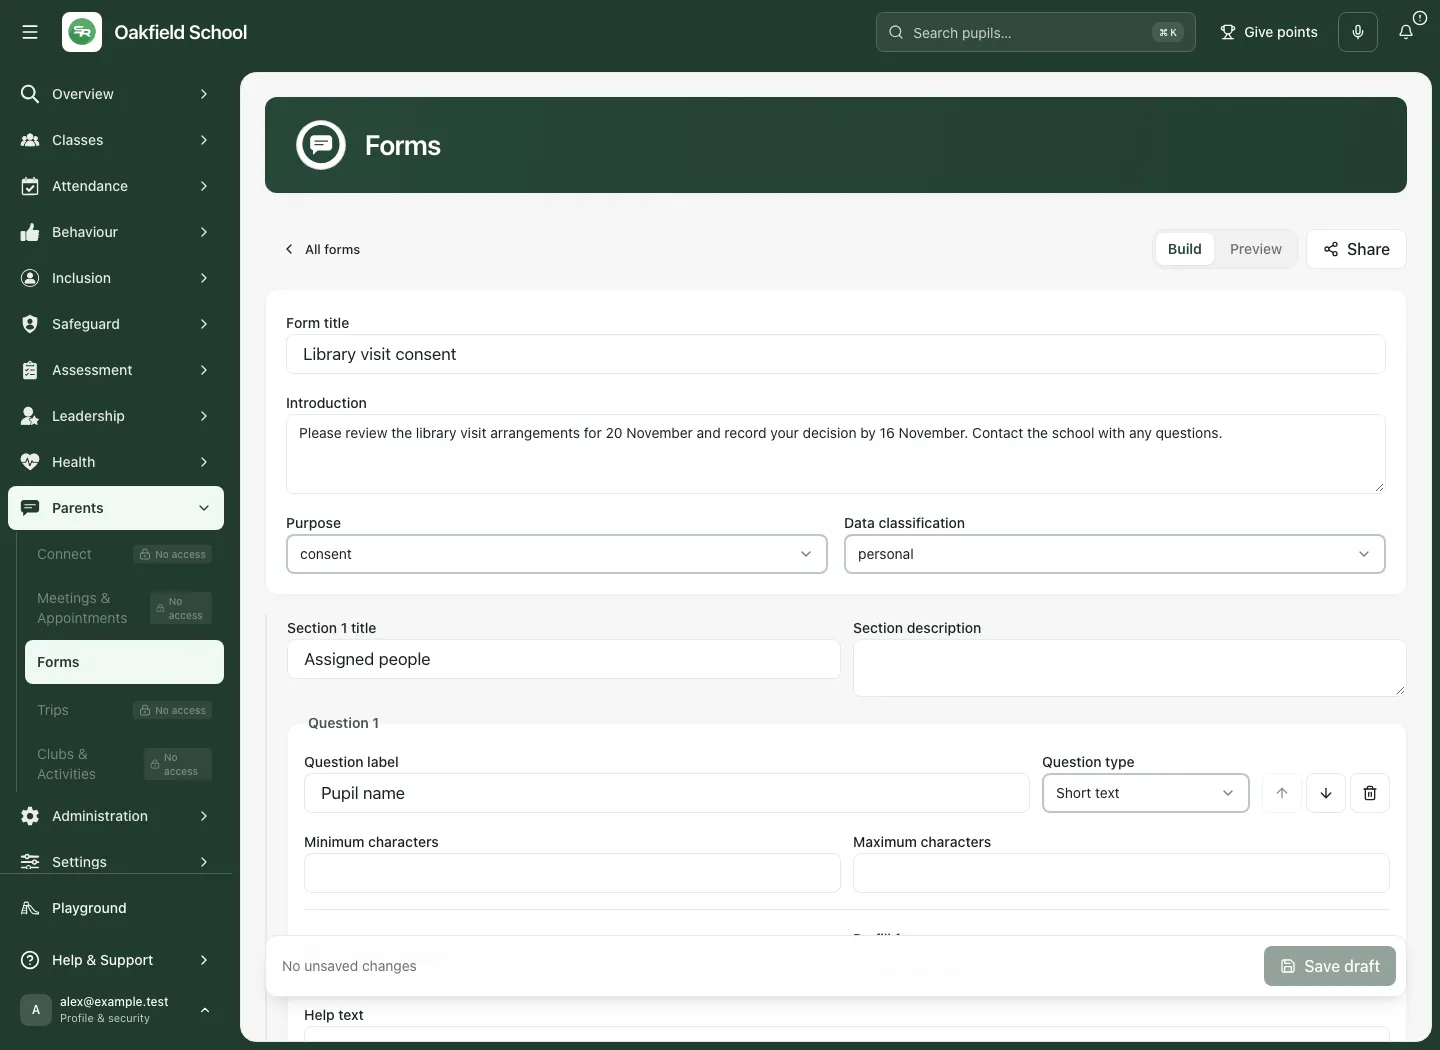
If another person has changed the form, use the current revision and resolve the difference. Do not repeatedly save stale text over a colleague’s work. Unsaved edits and an earlier published version can both exist; publishing history tells you which version recipients actually receive.
6. Set sharing, identity and review arrangements
Section titled “6. Set sharing, identity and review arrangements”Open Share; the editor used inside another application may call this Publication settings. Older forms keep their established audience/delivery contract. Newer forms show Sharing and responses.
- Under Who is this form for?, select the intended groups.
- Choose Can you see who responded?. Named, confidential and maximum-anonymity arrangements have different limits; select the minimum identity needed for the purpose.
- Set Approval before sharing and Review responses before accepting them. Publication approval and response review are separate decisions.
- Choose How should reminders be sent? from the channels configured for this form.
- Review advanced settings, including the canonical language, retention and specialist/workflow choices available for this form. Save the changed draft before publishing.
- In Collaborators or People & history, give a colleague the appropriate role rather than sharing an account. Review changes and publication history when handing over ownership or editing responsibility.
Maximum-anonymity forms cannot provide named completion tracking or targeted reminders. Reports can hide small groups. Do not promise anonymity while configuring a named-person workflow, payment or follow-up that requires identity.
7. Publish the saved form
Section titled “7. Publish the saved form”- Review the complete saved draft, preview, audience/identity arrangements and validation messages.
- Open Share and read Publishing history and Ready to share?.
- If independent review is required, choose Send for approval, read the confirmation and choose Send for approval again. The current state becomes Awaiting approval.
- A different authorised colleague opens Approvals, reviews the exact revision and uses Approve exact revision. Approval does not automatically mean the version is already published.
- Use Publish approved revision when that is the offered next step. Where direct publication is permitted, use Publish form, read Publish this form? and confirm Publish form.
- Check the resulting published version. Later edits form another version; existing campaigns and referral stages do not silently move to a different one.
A collaborator with editor access may be able to edit without being allowed to publish. A disabled publication button can mean unsaved changes, validation problems, pending approval or insufficient authority. Saving a draft is not sending it to families.
8. Create a campaign for the right recipients
Section titled “8. Create a campaign for the right recipients”A campaign distributes a particular published form version. Check the people selected and the version before publishing it.
- Open Campaigns, start a campaign and choose Published form. Load more published versions if the intended one is not in the first page.
- Enter Campaign title and select Audience. Use the actual pupil, family, staff or authorised external selections available for that audience.
- Set Completion policy and Amendments when offered. For guardian audiences, decide how substantive answers from different carers will be reconciled.
- Set Minimum reporting cohort where relevant, Opens at and Closes at. Closing time must be after opening time.
- Review Automated reminders. Maximum-anonymity campaigns cannot use individual completion reminders.
- If payment is enabled, an authorised finance colleague configures the canonical payment request, Payment title, Amount (GBP), Charge classification, Due after request (days) and any description. Read whether the trigger is after submission or after approval. Payment does not grant consent or any other status.
- For external recipients, verify Name, Verified email, External reference, Language locale and Contact authority record. Do not enter an unverified address merely to bypass an unavailable school relationship.
- Choose Review and publish. Read the recipient count and the exact published version in Publish this campaign?. Choose Confirm publish only when correct.
- Open the campaign dashboard and check its actual state, response denominator and any delivery issues. Creating controlled recipient selections is not proof that everyone has received or completed the form.
Use a new campaign/version for a changed purpose or materially changed wording. Do not assume publishing another form revision updates an already issued request.
9. Respond, amend and review
Section titled “9. Respond, amend and review”Recipients use their permitted assignment or controlled link. They should check the form title, pupil/context, language and declaration before answering. Required questions and file limits still apply. Pending or failed translations can fall back to the official original. Sensitive forms can require an approved translation; contact the school for human help rather than guessing at the wording.
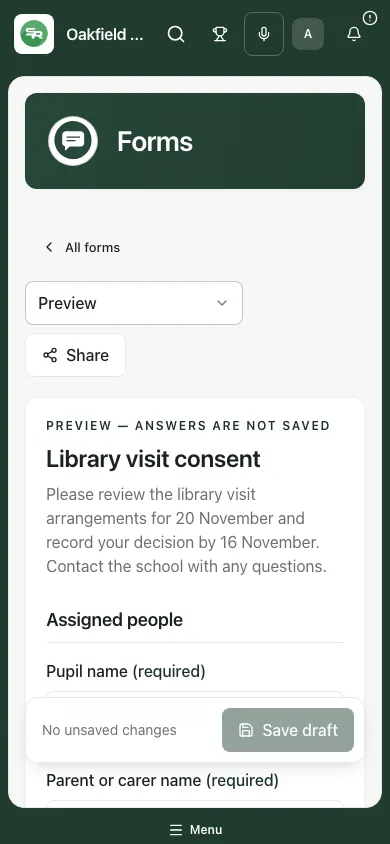
On a phone, scroll through the whole form and read the declaration and final submission controls. A preview is not a recipient assignment.
For staff reviewing responses:
- Open the campaign Responses or the Response reviews workspace and choose Review response.
- Read Structured response, signature receipts, clean file evidence and Revision and provenance. Check the published version and current review state.
- Use Open previous revision or Open later revision to understand an amendment. Submitted revisions are evidence; reviewing them does not edit their answers.
- In Record review decision, choose Approve, Request changes or Reject.
- Enter a clear Rationale of at least three characters, then choose Record decision. Confirm the resulting state and decision history.
- If two guardians have conflicting substantive answers, use the campaign’s Guardian response reviews. Keep the responses frozen while the authorised owner records the reconciliation decision; do not treat the latest click as automatic agreement.
- Assign any further work deliberately. A submission, approval and specialist record update remain separate outcomes.
The assignments inbox brings together the requests a person may act on. An unavailable assignment may have expired, closed or been withdrawn, or your relationship/access may have changed. Ask the form owner to check the current request rather than reuse someone else’s link.
10. Reports, exports and evidence
Section titled “10. Reports, exports and evidence”Use the campaign Response denominator before interpreting a completion percentage. Read whether the count is people, assigned recipients or submitted revisions. Small choice aggregates may remain hidden until at least five people have responded. A hidden result is not zero responses.
- In the campaign Exports, enter Export reason when identifiable information or receipts are needed.
- Choose Campaign summary PDF, Response CSV or Structured JSON, according to your permission and the purpose. A disabled format can reflect the form’s identity policy or reporting contract.
- Follow the export status/recovery controls rather than starting multiple duplicate requests. Downloads expire; request a fresh authorised download if needed.
- Store the exported evidence only in the approved school location. An export does not widen access to protected identities.
Where Analytics is enabled, select Campaign, From date, To date, Group results by, Filter by and Filter value. Only fields marked reportable by the form creator are available. Review suppression and coverage messages before drawing a conclusion. For trends, choose Trend field and Interval; small periods may be omitted. Use Export this view with an Export reason when aggregate export is enabled. Individual response drill-through is separately controlled.
To configure reporting in the newer builder:
- Open Reporting configuration and choose Enable reporting.
- Use Find a report field, select the answer-producing fields that should be reportable and check their stable output keys.
- Set each field’s reporting role: dimension, measure, filter or detail only, according to the supported type. Choose its count/percentage or numeric aggregations.
- Set missing-value handling to Exclude from result or Count as missing, then review the minimum cohort, sensitivity and drill-through choice.
- Save and follow the form’s publication route. Maximum anonymity never allows response drill-through. Disable and clear reporting removes the configuration; review that decision before saving.
Reporting configuration determines reportable fields, groupings, measures and privacy thresholds before publication. Do not expect arbitrary free text or confidential identity to become a reportable category.
Use Evidence to find the permitted response/evidence context. A search result or linked source does not grant access to a restricted response, clean file or specialist record.
11. Response workflows and integrations
Section titled “11. Response workflows and integrations”Authorised form owners can configure Response workflows separately from what the recipient sees.
- Select When the workflow should act and Then choose the supported action.
- For a notification, complete Notify, Notification title and Message. For work, complete Task title, Description, Assign to role, Priority and Due in days.
- For a follow-up form, select the Published follow-up campaign. For a specialist projection, select the Registered projection and Target record; do not assume any record can be written from a form.
- Review the shared-decision requirement and Enabled setting. Complete validation, save the form and follow its publication route.
- Review downstream outcomes after real responses. A configured rule is not evidence that a task, notification or specialist update has happened.
Webhooks is a privileged integration area. Register the Endpoint name, Exact HTTPS URL, approved Allowed output keys and HMAC signing secret only with the authorised technical owner. Sensitive output approval and general endpoint management are separate. Use Replacement HMAC secret → Save replacement secret for an authorised rotation. Disable endpoint is terminal: read its confirmation; delivery evidence remains for permitted review. Never place secrets in form questions, screenshots or messages.
12. Historical archive and retirement
Section titled “12. Historical archive and retirement”Historical archive is for controlled reconciliation of older evidence. It does not turn imported documents into new live submissions.
- An authorised administrator establishes the Microsoft connection or bounded upload source and records the admin-consent evidence. Continue to Microsoft is a real external authorisation step.
- Use Register selected source with the exact source type, name, connection and item/folder IDs. Choose the intended reconciliation policy and Register source.
- Review selected sources and their sync state. Queue sync, Pause, Resume and cursor reset are governed operations, not routine form editing.
- In the reconciliation queue, open only a clean original. Review the published form version and structured output before Confirm historical evidence.
- If excluding an item or reconciling a failure, enter the required reason/review note and choose the appropriate explicit decision. Do not silently omit failed items from the totals.
- Before Sign off and retire source, reconcile totals and the evidence sample, read the Sign-off declaration and confirm the authorised retirement. This is different from archiving a current form definition.
Troubleshooting
Section titled “Troubleshooting”The form is missing or read-only. Check the school, form owner/collaborator role and current permission. Reload after an access change. Ask the owner for appropriate access; do not copy protected responses elsewhere.
Save or publication is blocked. Read validation and revision messages. Save draft edits, fix missing options/conditions or required settings, then retry the intended operation once. A pending approval may need an independent reviewer rather than another submission.
A recipient cannot see the form. Check the published campaign, dates, selected audience and current relationship. The draft preview and a published form definition are not a live recipient request.
Completion or answers seem missing. Read the denominator, identity mode, review state and amendment/conflict state. Anonymous reporting and small-cohort suppression intentionally limit what can be shown.
A file cannot be opened. Pending, rejected or failed security scanning is not a clean attachment. Ask for a supported replacement through the approved route; do not bypass the quarantine.
A translation is unavailable. Read the displayed language status, switch to the official original if you can understand it, or ask for human translation before responding.
An export has expired or failed. Use the provided recovery/status controls. Keep the reason and scope appropriate; a fresh download requires current access.
Questions schools often ask
Section titled “Questions schools often ask”Does Save draft send the form? No. Publishing the saved form and publishing a recipient campaign are separate steps.
Can editing change an answer already submitted? Responses keep their immutable revision and published-version provenance. Amendments and review decisions are recorded separately.
Can both parents reply? The campaign’s completion policy and guardian conflict review determine how responses are handled. A conflicting response should not silently replace another guardian’s decision.
Can a form update health, safeguarding or trip approval automatically? Only registered, authorised workflows can project supported outcomes. The specialist source still owns its facts and lifecycle; a consent tick is not a substitute for its decision.
Can we identify anonymous respondents to chase them? Maximum anonymity does not support named completion tracking or targeted reminders. Choose the correct model before publication.
Why do controls differ from this example? Form schema, school feature enablement and your permissions can change the builder and available workspaces. The screenshots show a fictional legacy consent form; newer capabilities are described where relevant.
Related guides: Connect, Trips and Meetings & Appointments.