Find, replace and maintain SEND documents
Written for: SENCos, school leaders and authorised document users.
Find the current SEND file, check its audience, inspect versions and replace or archive it without losing history.
Consultations use their separate Consults workflow. Use the document’s specialist workflow when changing a pupil’s plan or recording an external decision; storing a file does not make those changes automatically.
Check school and access before uploading or opening files. The server supplies the actions and upload audiences available to your account. Staff-wide, SLT-only and SENCo-only describe general-document visibility. EHCPs display the separate Head, SENCo & DSLs audience; a general visibility choice must not be treated as changing that EHCP audience.
All screenshots show a fictional school policy. Archive and restore use mocked state, with no live school write or real document uploaded.
Find the right current document
Section titled “Find the right current document”- Open SEND Documents. Check the library title and current school.
- Enter text in Search documents, tags or filenames. Use All categories to choose Policy, Templates, Training, Governance or External agencies.
- Use All visibility to narrow the displayed audience. The filter finds permitted records; it grants no new access.
- Use Sort documents to choose recent updates or title order. The register shows the latest version and update date; use Previous and Next for other pages.
- Choose Include archived only when looking for retired records as well as current ones. Archived documents are labelled and cannot be opened until restored.
- Use Refresh after a failed read or another colleague’s update. A load error is not evidence that the library is empty. Take a tour introduces the available workflow.
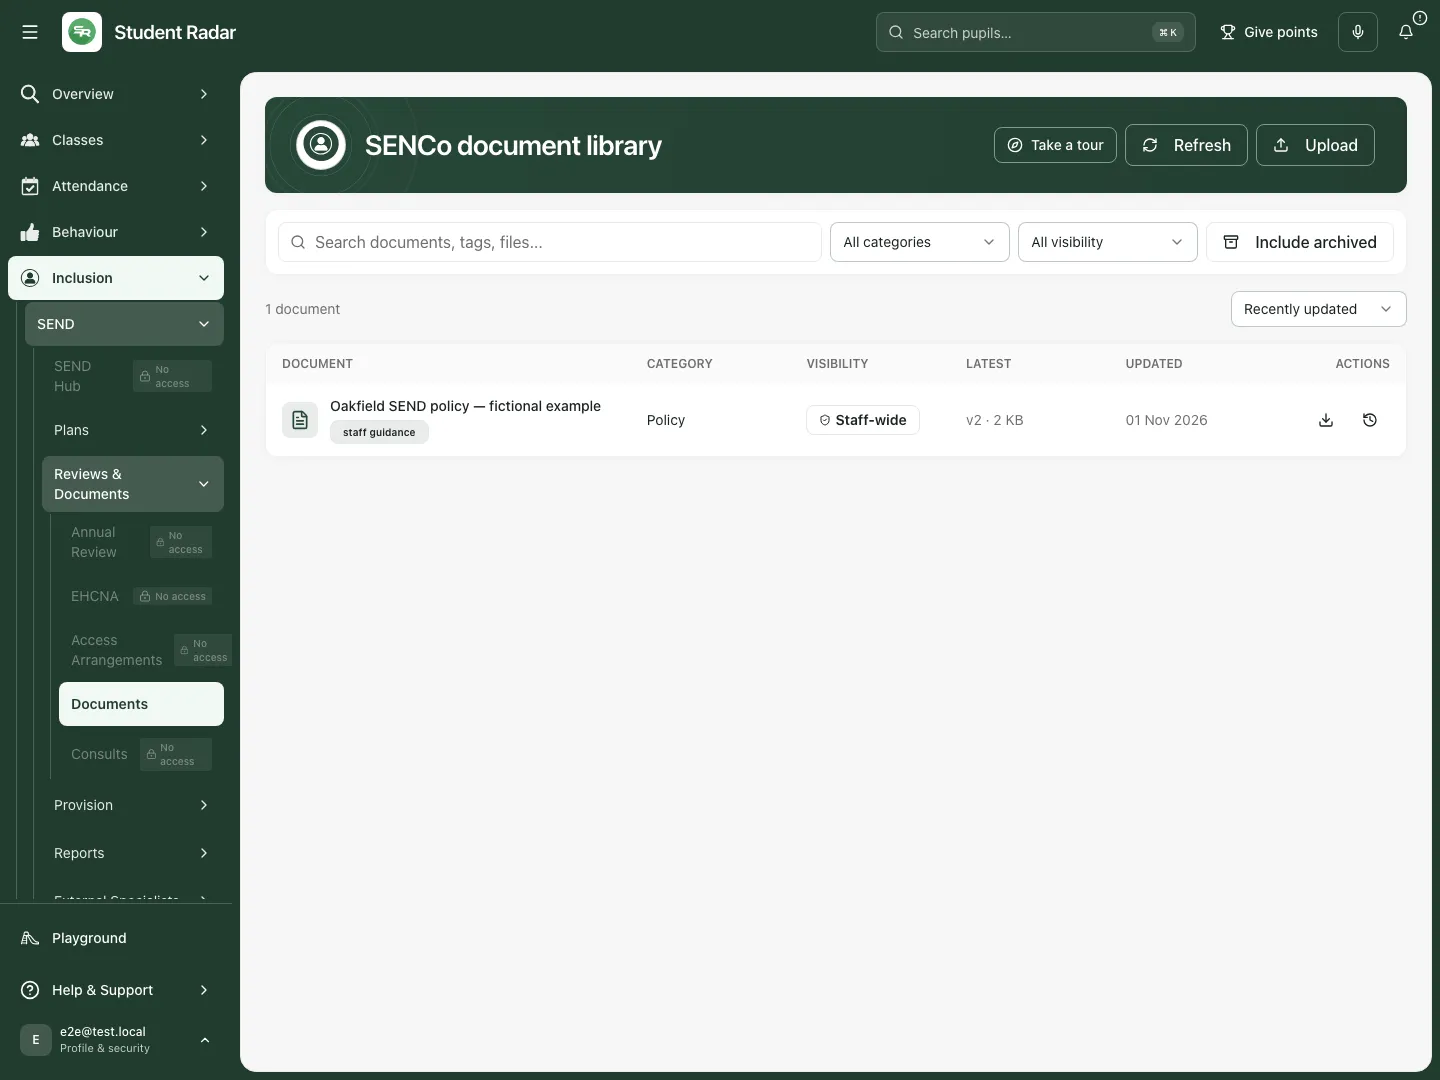 The fictional policy is staff-wide and at version 2. Category, audience and update date remain visible before opening the file.
Upload a document with the right audience
Section titled “Upload a document with the right audience”- Choose Upload. Select File and enter a clear Title.
- Choose Category and the permitted Visibility. Add useful Tags so colleagues can find the record without placing confidential details in a title.
- Choose Document type: General SEND document or EHCP when the account offers that choice. EHCP uploads use PDF; general documents support PDF, Word, Excel, plain text, PNG and JPEG, up to 25 MB.
- For a reusable general template, tick Add to templates and choose Template kind: ISP, Review, Agency referral or Other. A stored template and a pupil’s completed plan are different records.
- Enter Change note to explain the initial upload, then choose Upload. Check the result and library row before uploading again after an uncertain response.
- Cancel closes the form without uploading. If permission or allowed audience changes while it is open, choose an available valid audience and review the details again.
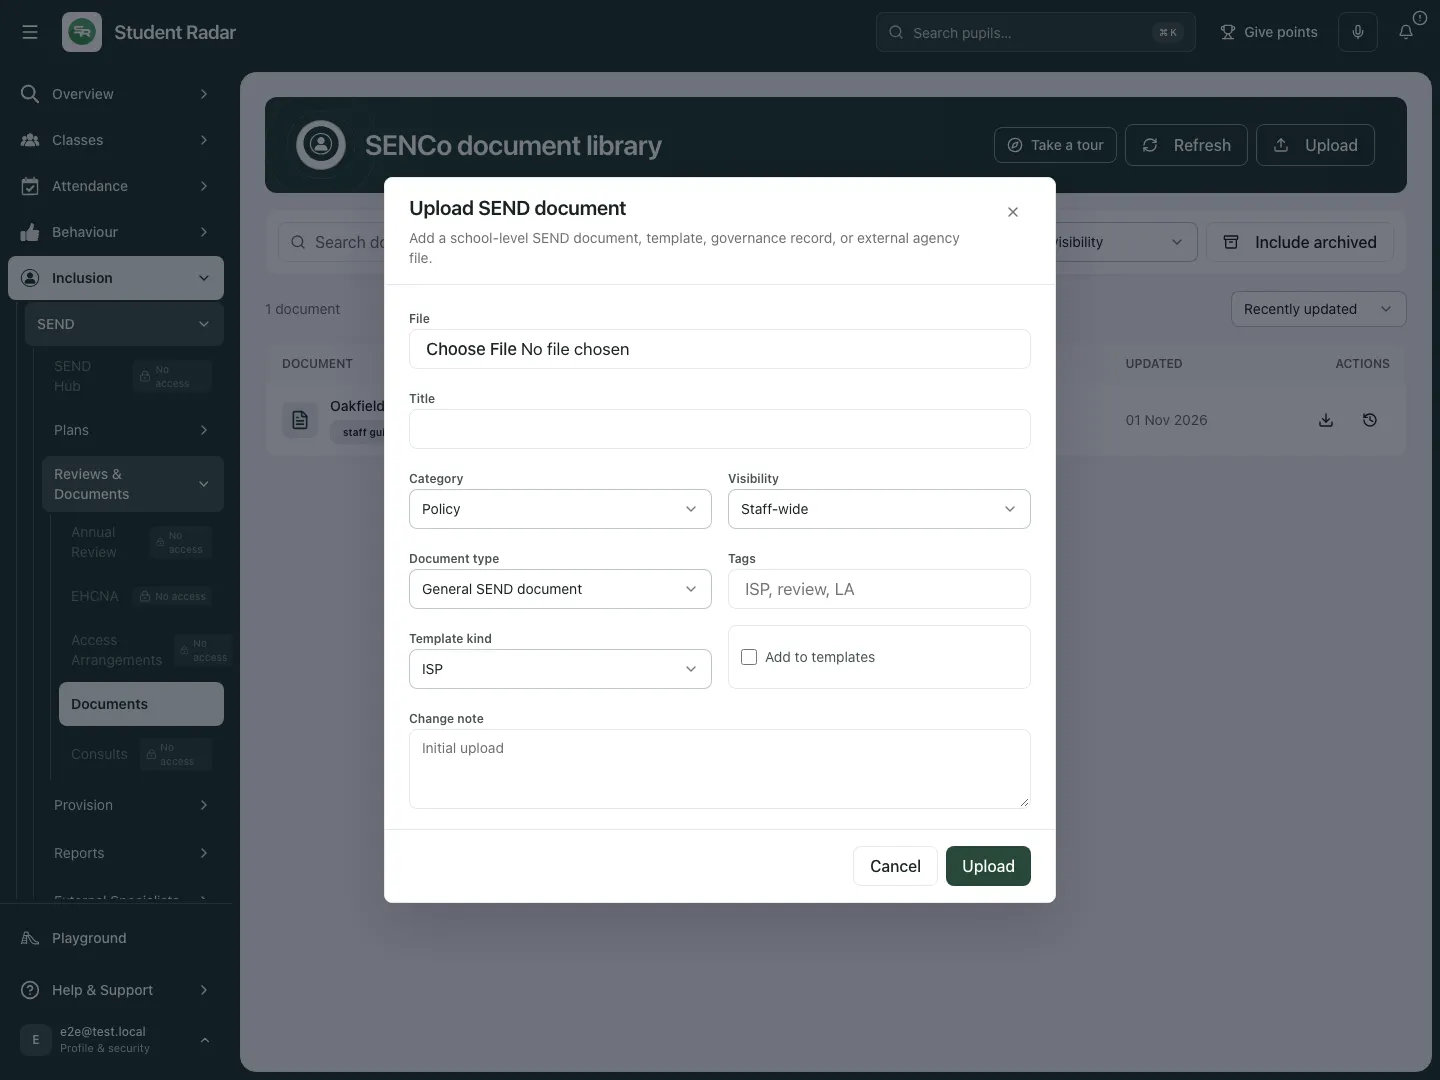 The fictional walkthrough opens the real upload form and cancels. No file is uploaded.
Open, download or use a template
Section titled “Open, download or use a template”- Select the document title or its preview control. PDF documents open in the reader; an EHCP PDF opens the annotation workspace.
- Check the filename and version before reading. Use the reader’s page, zoom and navigation controls to inspect the actual document, not just its title.
- Use Download for the intended version. The app obtains a time-limited download link; a failed or expired link needs a fresh authorised request.
- For a template, use the row’s template action. In the general library this downloads the template; a connected screen may offer Use when it has a defined template destination. Review the downloaded document and audience before sharing it.
- If a file-opening control is unavailable, check the displayed access message. Being able to see a permitted metadata row is not a promise that every account may open its file.
Inspect versions and the audit trail
Section titled “Inspect versions and the audit trail”- Choose Details for the document (the history icon beside its row/card).
- Under Version history, read each version number, filename, date and change note. The current row summarises only the latest version; details retain earlier versions.
- Use the download control beside the intended historic filename when you need that version. Check which version a meeting or decision refers to before reusing it.
- Read Audit trail separately from Version history. An upload, replacement, download or archive event describes an action; it does not prove someone understood or agreed with the contents.
- Use the offered history pagination when there are more records. If history fails, retry it before assuming there are no earlier versions or events.
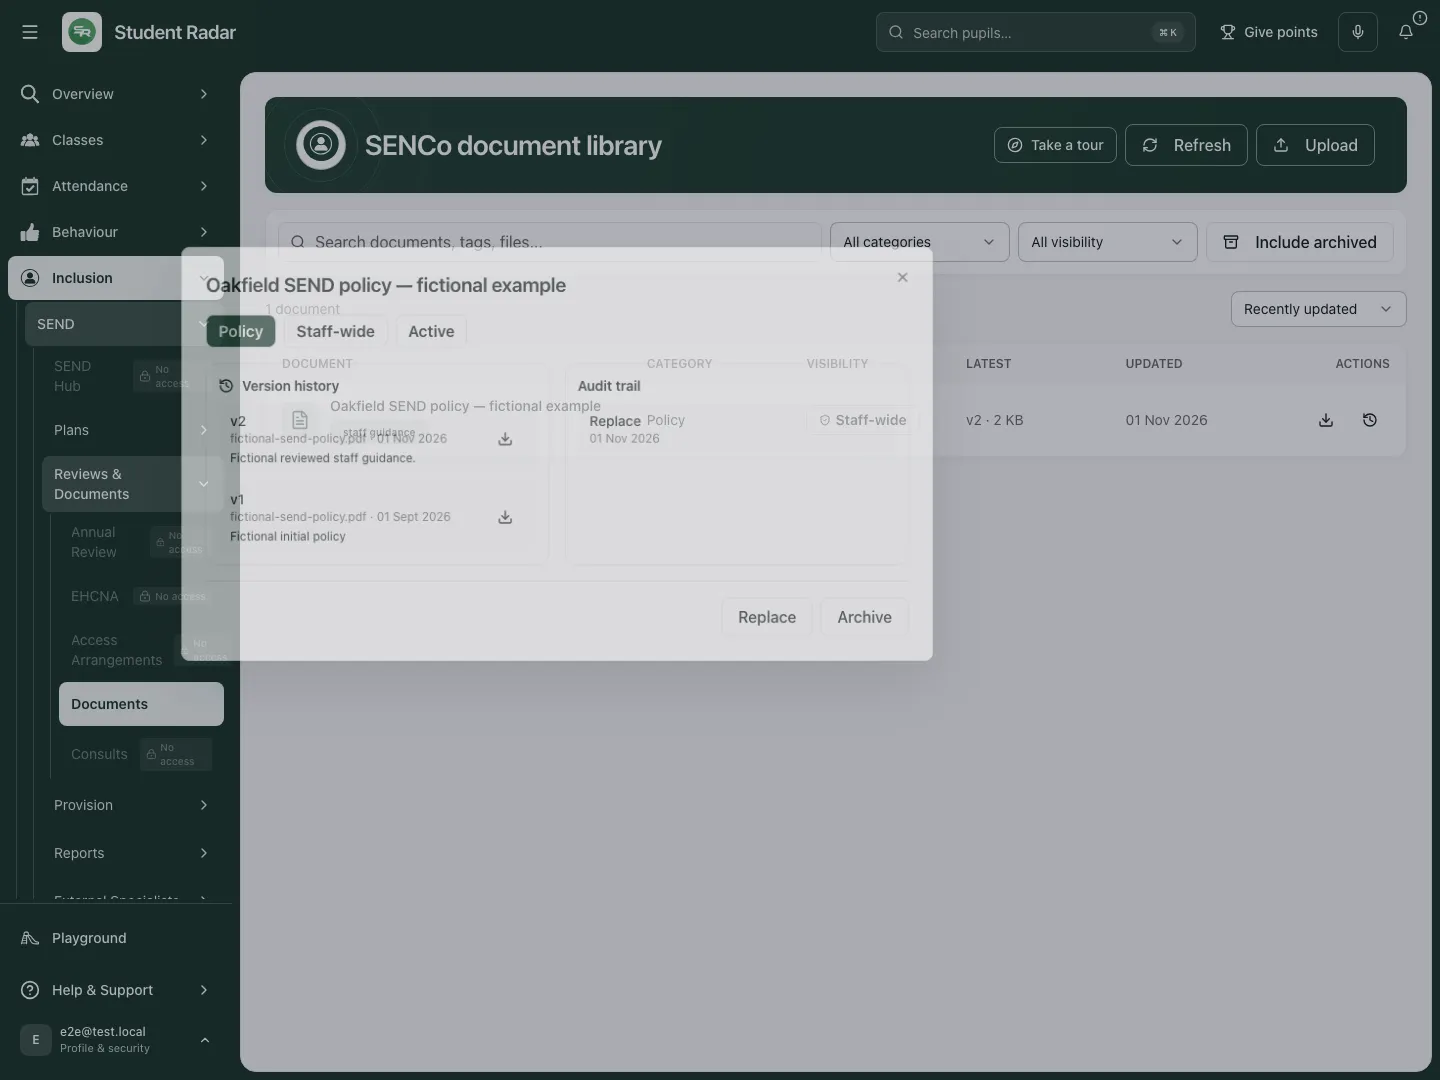 The fictional policy’s current and initial versions remain listed with their change notes; audit events are a separate record.
Replace the file while retaining history
Section titled “Replace the file while retaining history”- Open Details, then Replace.
- In Replace document version, select File and enter the change note explaining the new version.
- Choose Save version. Reopen Details and check the new latest version and the retained earlier versions.
- Use Cancel to leave the replacement form without uploading. If the document changed elsewhere, refresh and review the newer version before repeating your change.
A replacement updates this document’s version history. It does not silently replace an issued EHCP, change a pupil’s specialist plan lifecycle or certify that staff have reviewed the new file.
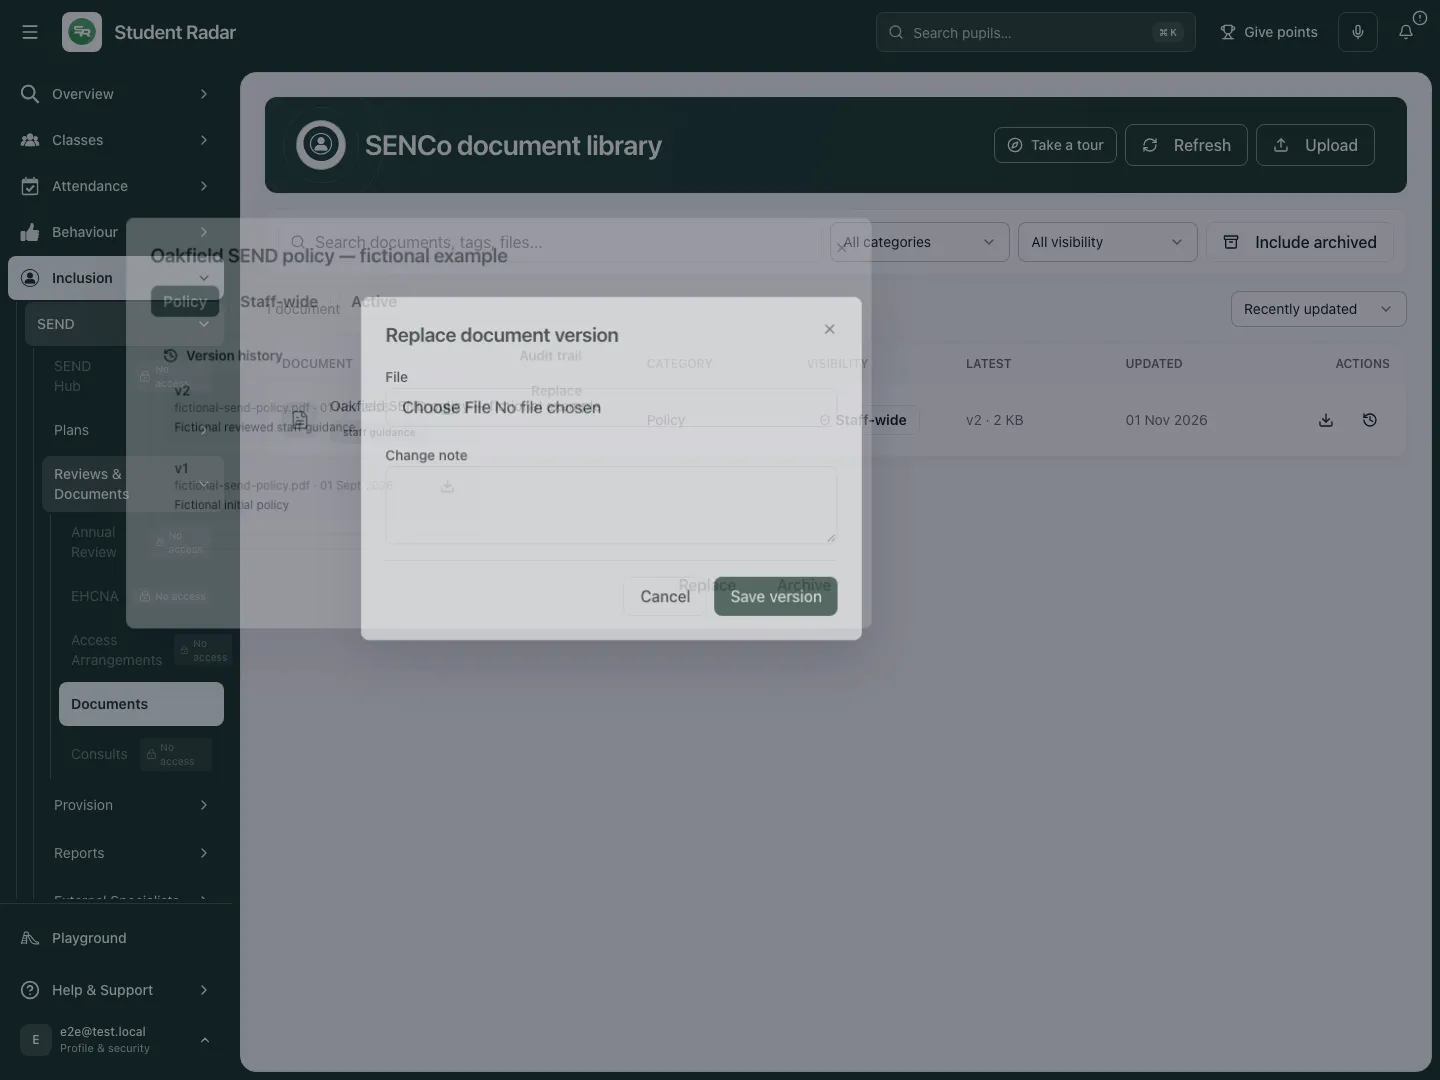 The fictional walkthrough opens Replace document version and cancels; the existing version history remains unchanged.
Archive a retired document and restore it when appropriate
Section titled “Archive a retired document and restore it when appropriate”- Open the intended document’s Details and check its title and status.
- Choose Archive. The document leaves the current list and its file-opening/replacement actions are blocked while archived; history remains available.
- Close Details, choose Include archived, then open the document again. Check its Archived badge and the restoration notice.
- Choose Restore when the document should be current again. Close/reopen Details and check the Active status and available actions.
- Review the result after an uncertain request rather than assuming archive or restore succeeded. These actions do not delete the stored evidence/history and do not record a pupil-plan or consultation outcome.
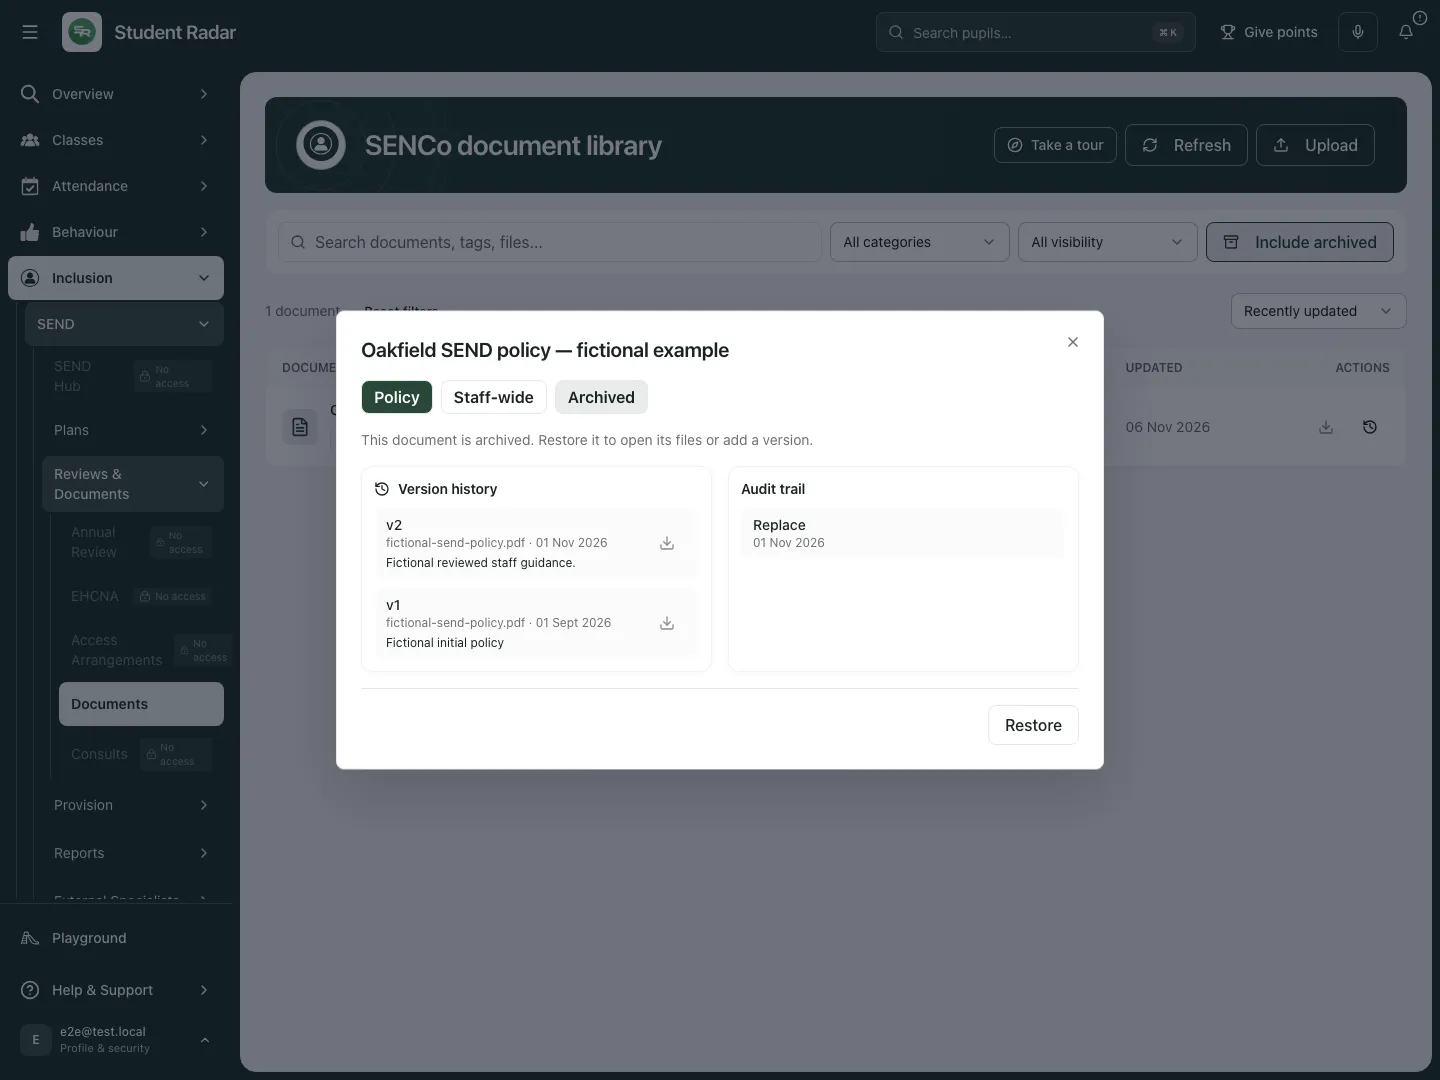 The fictional policy reopens as Archived after a mocked action. The notice explains that restoration is needed before opening files or adding a version.
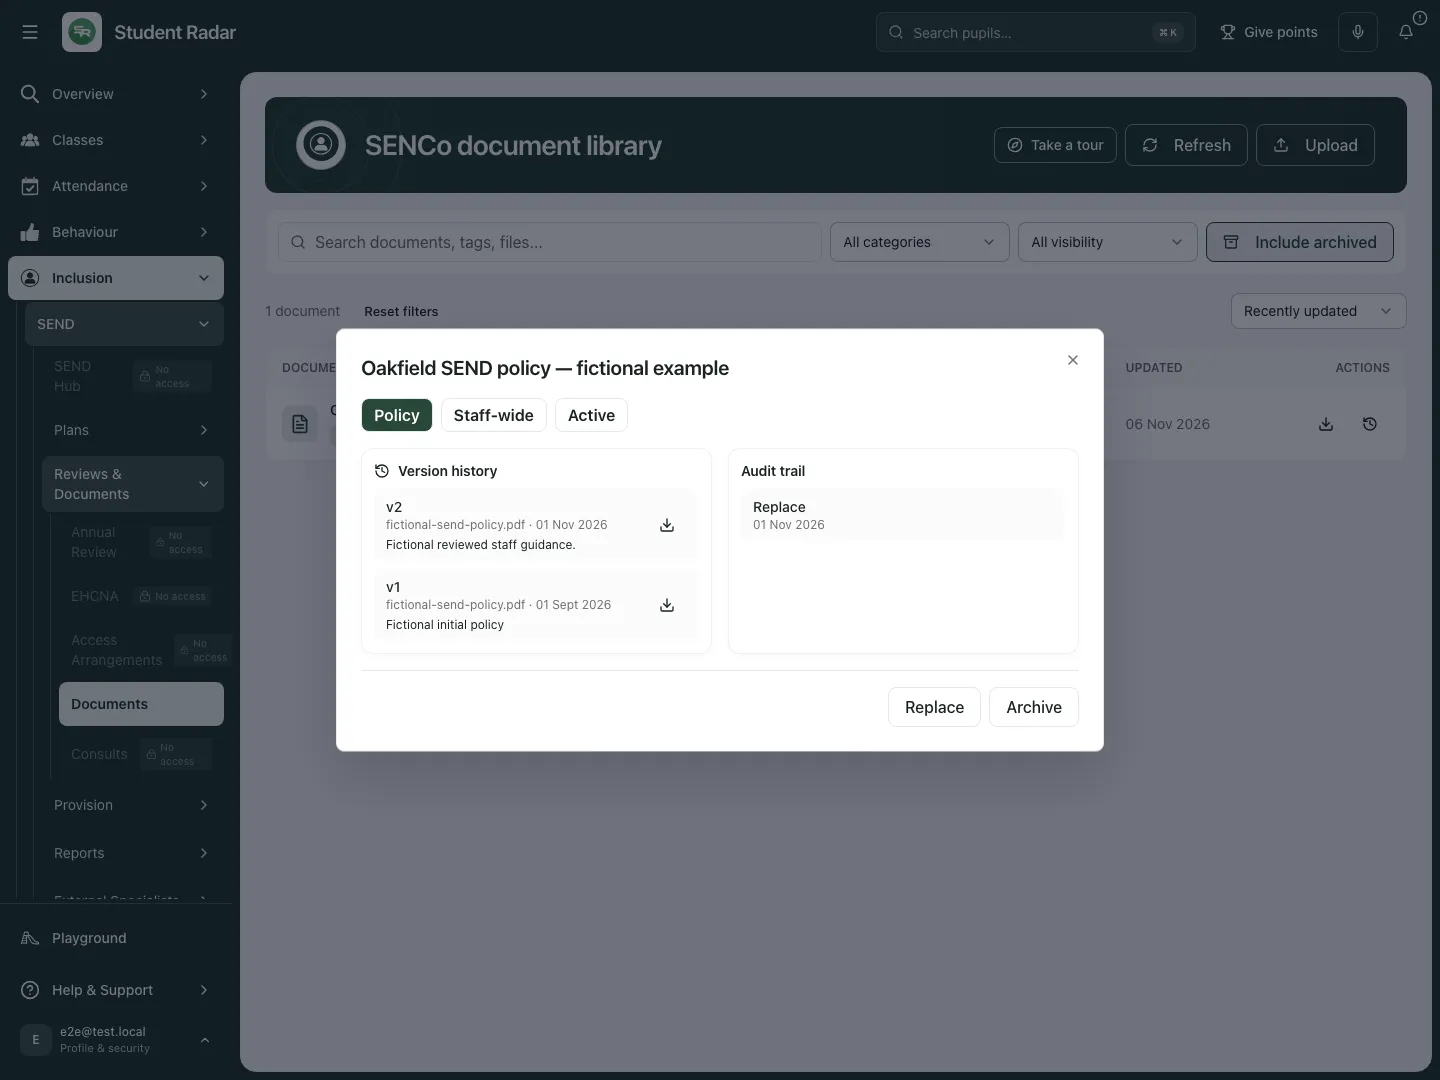 The same fictional document reopens as Active after restoration, with both versions still present.
Work on an EHCP PDF: excerpts and highlights
Section titled “Work on an EHCP PDF: excerpts and highlights”These conditional controls apply when opening an EHCP PDF; they are source-inspected rather than exercised on a real child’s file in this guide.
- Open the intended EHCP and check its displayed version. Choose Excerpt to select text for the notes/excerpt canvas, or Highlight to mark the PDF visually. They have different effects.
- In Excerpt mode select the relevant passage. Check the selected source wording and page before writing the note.
- Choose Send to and a label such as Concern, Strength, Evidence needed, Contradiction, Not being delivered, Changed since last review, Query for LA, Parent view, Pupil view or Action needed.
- Enter the note and choose Save excerpt. Save unlabelled retains an excerpt without claiming a particular interpretation. Wait for the saved state before leaving.
- In Highlight mode select the intended area and check the saved mark. Highlight keeps a visual mark on the PDF; it does not send selected text to the excerpt canvas.
- For a scanned area with no extractable text, keep that limitation visible. Use a visual highlight or the supported image-clip action rather than treating absent extraction as a reliable transcription.
Add notes, checklists and evidence connections
Section titled “Add notes, checklists and evidence connections”- In the canvas choose Text note or Checklist. Enter the note or checklist items and use the card’s Save action.
- Use Anchor to PDF when the item should refer to a particular location. Check the selected page/position; an unanchored note is not a quotation from the plan.
- Open a saved excerpt to edit its note or label. Changes save against that saved record; keep source text, page and version distinct from staff interpretation.
- Use Link to…, select the target excerpt and choose the relationship (Addresses or Excerpts), then Create link. Review the direction and target; a connection records the school’s interpretation, not new source evidence.
- Use label filters and Search excerpts, notes, and PDF text to find related records. Previous search match and Next search match move through matches.
- Use Arrange to organise the visible cards; Saved layout returns to saved positions. Arranging the view alone does not rewrite saved card positions.
- Before deleting an excerpt, note or image clip, check exactly what it removes. A deleted excerpt can leave its image retained when shared or when cleanup needs review; the page reports that state instead of claiming every underlying file was removed.
Save conflicts and phone annotation
Section titled “Save conflicts and phone annotation”If another colleague changes a saved note, review the Saved elsewhere copy against your local text. Save my changes is a deliberate reconciliation action; do not overwrite an important newer contribution without checking it. A pending save can block closing, while Leave without saving? distinguishes unsaved edits from annotations already saved.
On a phone use Navigate to move through the PDF and choose Excerpt or Highlight deliberately before marking it. Switch between the PDF and Notes & excerpts panes. Check that a gesture navigates or annotates as intended before recording source evidence.
Phone library use
Section titled “Phone library use”- Use the same search and filters on the compact library cards.
- Read category, audience and version before opening Details.
- Reopen the saved status after a management action; a narrow screen does not change its effect.
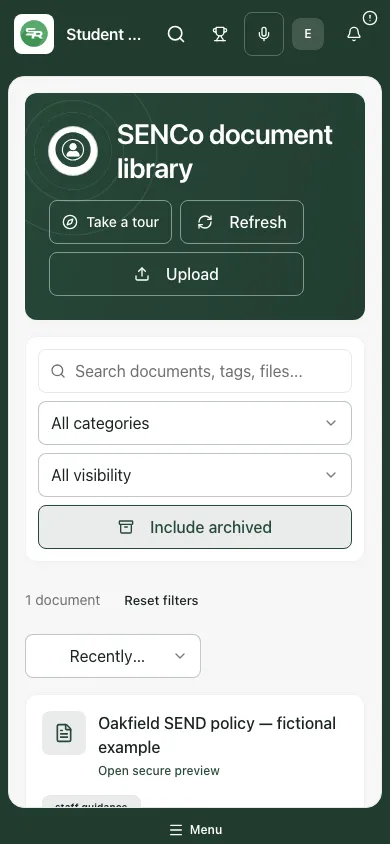 The fictional policy card retains its audience, category, version and Details action at phone width.
Problems and questions
Section titled “Problems and questions”Upload is unavailable. Check the account’s management action and permitted upload audiences. Do not use a broader visibility merely to bypass a blocked option.
The file is rejected. Check type and the 25 MB limit. EHCP and consultation workflows require PDF even though general documents accept more types.
An archived document will not open. Open Details and check the status. An authorised manager must Restore it before file-opening/replacement is available.
History did not load. Retry; an unavailable read is not an empty history. Keep the current version separate from any unverified earlier reference.
My replacement or annotation did not save. Preserve the draft, check the error and refresh the current record/version. Resolve conflicts before retrying; an upload response or toast is not a substitute for checking the saved version.
Does an EHCP visibility choice make it staff-wide? No. EHCPs have their separate displayed audience, Head, SENCo & DSLs. Check the specific file workflow and permitted actions.
Does highlighting change the EHCP? No. It creates a school annotation against the document version; it does not amend the issued plan or automatically create specialist work.
Related: EHCPs, Pupil Passports, Annual Review, EHCNA. Consults.